This post is part of the Stretch Yourself series, hosted by Miriam of
Mad Mim and Miranda of
One Little Minute. It is a two week long series about sewing with knits that started last week, covering various topics like fabric selection, pattern-making, construction, finishing techniques and projects by 10 guest bloggers.
Today I am very happy to be one of the guest bloggers! Please check out Rachel at
anu*miki who is also posting today about fabric printing.
For my tutorial, I wanted something very simple and beginner-proof since I am myself a beginner with stretch fabrics. I decided it was the perfect time to experiment a bit with block printing, something I had wanted to try for ages.
I'll show you a very easy way to give new life to that old, plain t-shirt that lays forgotten at the bottom of a drawer.
Here's what you need for this project:
✄ A plain t-shirt (or fabric)
✄ Fabric paint
✄ Carving block (linoleum or rubber)
✄ Carving tool
✄ Something to help you spread your color (a brayer or a sponge)
✄ Wood (or acrylic block) and glue to mount your stamp
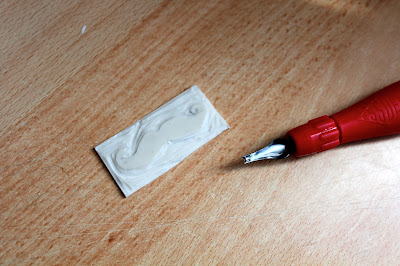
After you've gathered your materials, you need to choose the subject you want to turn into a stamp. If you're a beginner, try something with an easy silhouette. I chose a moustache, which is quite trendy, geeky and because I just love quirky prints.
You can either draw your silhouette directly on the lino/rubber block, or you can draw it on tracing paper with a soft pencil...
... put it face down on the block and trace over the lines with the pencil. It will be magically (ok, not really) transfered on your surface.
Now cut your shape leaving some space around the edges... and start carving! I always start with the outline, trying to be as precise as I can.
Keep carving until you're satisfied with the result. At this point, it's a very good idea to try your stamp with an ink pad on some paper to see if there are areas that need to be refined.
Take your time, you want your stamp to have clean edges and look nice and sharp.
When you're satisfied with what you have, glue the carved block on your wood block and allow it to dry.
And you're ready to stamp!
Use some cardboard to make your t-shirt lay flat; this will also prevent the paint to bleed on the back of the t-shirt.
Spread the paint on the stamp: I had the best results using a disposable cosmetic sponge, but one of those spongy brushes will work as well.
For a more precise result, you can mark the position of the print on the t-shirt with little dots. I just eyeballed it.
When you're done printing, allow the paint to dry and follow the instruction to permanently stabilize the color. My paint needed to be ironed at low heat.
My t-shirt was just an experiment and although it's far from perfect, it turned out very cute!
It definitely got me excited for this technique: it's a great way to jazz up an old, plain t-shirt (but also a cardigan or a sweater), but also to create your own printed fabric from scratch.
The sky is the limit!
Read more about sewing with stretch lace over at anu*miki


