
Size: 8
Alterations: none on the pattern, fitted as I went (read below).
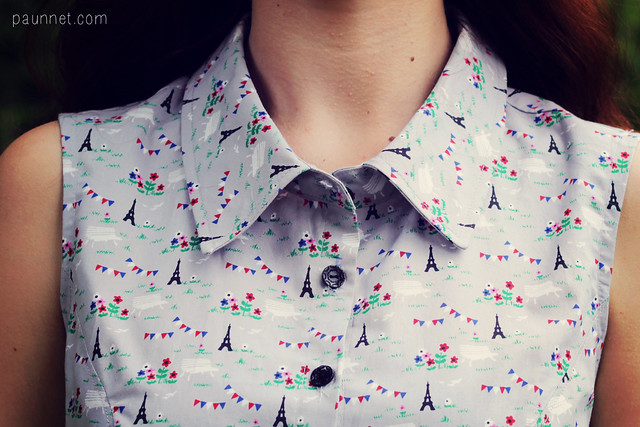
Fabric: cotton lawn from Minerva Crafts, available here.
The project of this month for the Minerva Blogger Network is a little bit special, because we were asked to make some party attire to wear at the Minerva meet up last week. I was quite heart-broken I didn’t get to attend, but making a cute dress helped me get in the party mood.

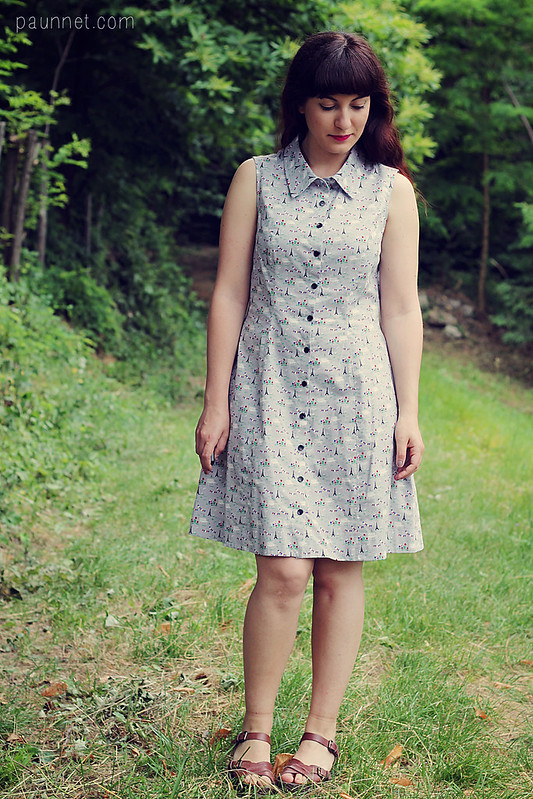
After spending a long, long time deciding what kind of dress to make for such an event, I decided to go with the Flora dress pattern by By Hand London. I was one of the very few bloggers who was not invited to test this pattern (sigh, why?), but I really liked the design. My kind sponsor, Indie Stitches, provided the pattern for me.
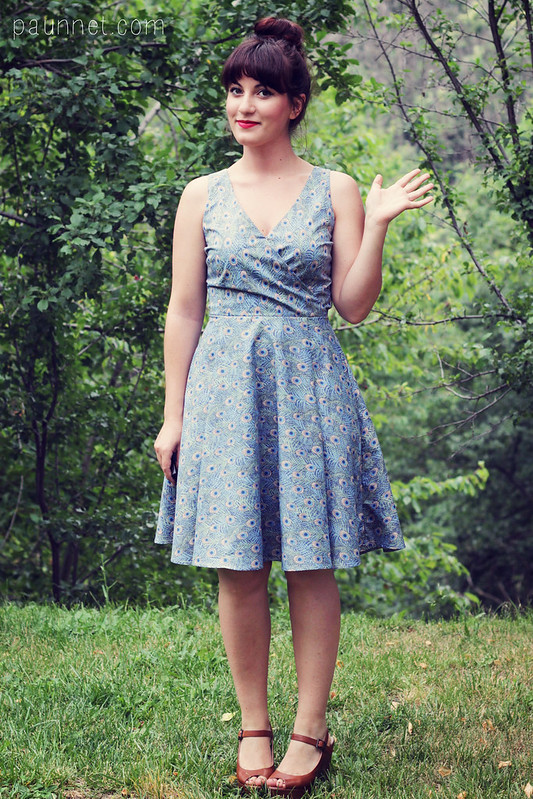
I initially wanted to make the version with the high neckline, but after a muslin, I decided it looked a little too casual for the occasion, so I opted for the faux wrap, which is also more flattering on me.
I cut a size 8 and made no alterations, although once the fashion fabric was sewn, I ended up with a lot of excess fabric around the waist (almost 8cm). It’s one of those mysteries of sewing I just can’t seem to figure out: the muslin fitted almost perfectly; there were about 2cm of ease at the waist, most of which I thought was going to disappear by lining the bodice. I don’t know what happened later, because I took my time cutting, staystitching and stabilizing the neckline… Probably, I just didn’t do a very good job on my muslin, and didn't pay it the attention it needed.
I dunno, but anyway, once the bodice was completely assembled and self-lined, I decided to make it work, grin my teeth and remove the excess from the center back (which is not a very good solution). This means the side seams are now shifted towards the back and the back armholes are a little too deep, but that’s ok.
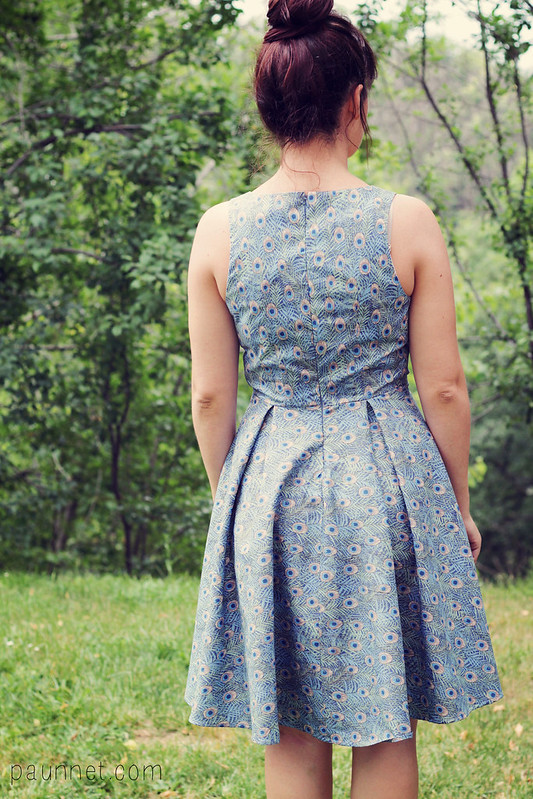
The second “make-it-work” moment happened when I realised the circle skirt required a 60” wide fabric, and the one I chose wasn’t as wide. Again, I opted for a solution I wouldn’t recommend to anyone and used the fabric on the cross grain. The print is busy enough that it’s not too obvious, and the effect is not too ugly. I really wanted the circle skirt at that point, so I’m kind of glad I cut it anyway. The knife pleats on the front are truly stunning, while I’m not too crazy about the box pleats of the back.
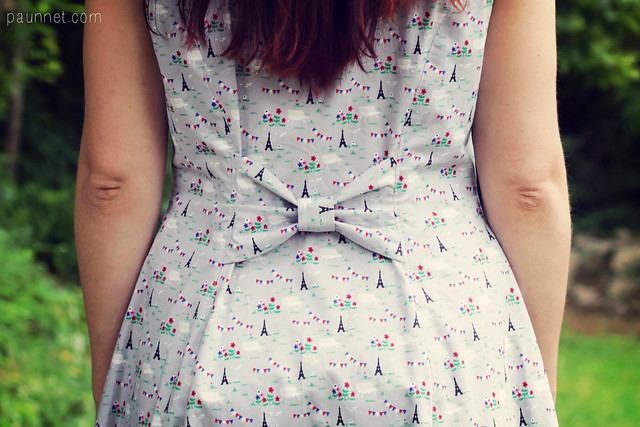
What else? Oh! I installed an invisible zipper! If you’ve read my blog for a while, you’ll know I simply hate this kind of zipper, because while it’s more discreet to the eye, it’s a pain to install and it breaks way too easily for my taste. But I thought it would really look better for this kind of dress, and I’m happy with my choice.

As you might have seen in my sneak peek post, I also made a petticoat to go underneath this dress. I thought a petticoat would play up the vintage feel of this dress and would make it look more elegant for this special occasion, except… I now know that I don’t like the look of petticoats on me, AT ALL! This thing took a lot of time and patience to make, and I must thank Ela of Elochka for giving me a private mini tutorial on its construction; I doubt I’ll ever wear it again, but I’m glad I got to try it on. At least, now I know.
All in all, I’m really happy about this dress and I can’t wait to have a real event to wear it to! If you want to make it for yourself (petticoat included) the kit is available here. To be completely honest, my plan changed after putting the kit together, so I would rather recommend getting the peacock fabric here and the organza for the petticoat here.
Taglia: 8
Modifiche: nessuna sul modello, modificato mentre cucivo (leggere sotto.)
Tessuto: di Minerva Crafts, disponibile qui.
Il progetto di questo mese per il Minerva Blogger Network è un po' più speciale del solito, perché ci è stato chiesto di preparare un outfit da festa per il meet-up di Minerva Crafts che si è svolto la settimana scorsa. Sono tristissima di non essere riuscita ad andare, ma cucire un bel vestitino mi ha aiutato a mettermi del mood della festa :)
Dopo luuunghe, luunghe riflessioni per scegliere che abito fare, ho deciso di optare per il modello Flora dress di By Hand London. Sono una delle poche blogger che non è stata invitata a testare questo modello (sigh, perché?), ma mi sono proprio innamorata del design e delle bellissime versioni viste in rete. Il mio gentile sponsor Indie Stitches mi ha fornito il modello.
Inizialmente, avrei voluto fare la versione con lo scollo alto, ma dopo una telina di prova, ho deciso che era un po' troppo casual per l'occasione, e ho optato per la versione con incrocio, che sta anche meglio sulla mia corporatura.
Ho tagliato la taglia 8 senza apporre modifiche, MA, ovviamente, una volta cucito il corpino, mi sono ritrovata un sacco di eccesso in vita (quasi 8 cm!). E' uno di quei misteri del cucito che mi capitano ogni tanto e non riesco proprio a capire: la telina era praticamente perfetta, c'erano circa 2cm di spazio extra in vita, e pensavo che la maggior parte sarebbe sparita foderando il corpino (il poco restante sarebbe stato mangiato nella zip). Non ho idea di cosa sia successo dalla telina all'abito vero e proprio, perchè ho tagliato attentamente e ho stabilizzato gli scolli per non distorcerli. Probabilmente avrò fatto qualche cavolata con la telina, ma non me lo spiego comunque.
Ad ogni modo, nel momento in cui il corpino era tutto cucito e foderato, ho deciso di stringere i denti e fare quello che non avrei dovuto, ovvero eliminare l'eccesso dalla cucitura del centro dietro (il tempo stringeva e non avevo nemmeno la voglia di smontare tutto). Voi non fatelo mai, per favore! Perché significa che adesso le cuciture del fianco sono spostate verso il dietro e il giro manica dietro è troppo profondo. Ma pazienza!
Il secondo momento di panico mi è arrivato quando mi sono resa conto che per la gonna a ruota serviva un tessuto largo 150cm, e il mio era 140. Ho di nuovo scelto una soluzione da evitare, ovvero di tagliare la gonna nel senso della trama (e non dell'ordito). Con questa fantasia, l'effetto non è estremamente evidente né bruttissimo, perciò alla fine sono contenta della scelta, perché volevo davvero la gonna a ruota. Le pieghe piatte sul davanti sono stupende e danno veramente una marcia in più a una semplice gonna a ruota, mentre gli sfondi piega sul retro non mi fanno impazzire.
Che altro? Ah, sì! Ho messo una lampo invisibile! Se leggete il mio blog da un po' di tempo, saprete che detesto a dir poco questo tipo di chiusura, perché, seppur più discreta delle lampo normali, non mi piace cucirla e si rompe troppo facilmente. Ma ho pensato che con questo tipo d'abito sarebbe statea meglio, e mi sa che avevo ragione.
Come forse avrete visto nel mio post pre-rivelazione, ho anche cucito una sottogonna da mettere sotto l'abito. Ho pensato che avrebbe giocato bene con il mood vintage di quest'abito e l'avrebbe reso ulteriormente elegante per questa occasione speciale, ma... ho scoperto che non mi piacciono le sottogonne su di me, ma proprio per niente!Ci sono voluti molto tempo e pazienza per cucire questa specie di meringa, e devo ringraziare Ela di Elochka per avermi aiutato con un mini tutorial privato sulla costruzione; dubito che la indosserò mai, ma almeno sono contenta di essermi tolta il dubbio.
Tutto sommato, sono molto contenta di quest'abito e non vedo l'ora di indossarlo per un'occasione speciale nella "vita reale"!