

As promised, here's the little tutorial to show you how I finish the inside of dresses with a bulky waist seam. It will reduce some unwanted bulk and give you a clean, beautiful finish, all in one!
It's a super easy technique, you'll see; and the only notion you need is about 1m of bias tape (as much as your waist seam measures).
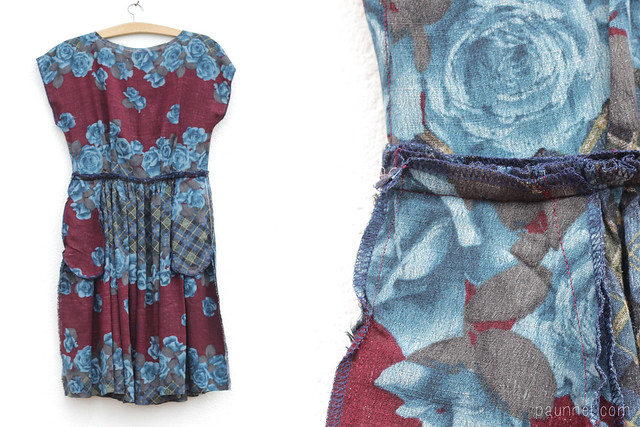
This is the stage of construction you want: the bodice and the skirt of the dress have been joint, but there still isn't a zipper. This dress has a center back zipper, but this technique will work on a side zipper as well.
I didn't even care to remove some of the basting threads I used to gather the skirt because we are going to trim the seam allowance anyways.
You want the seam allowance of the waist seam to be pressed upward.

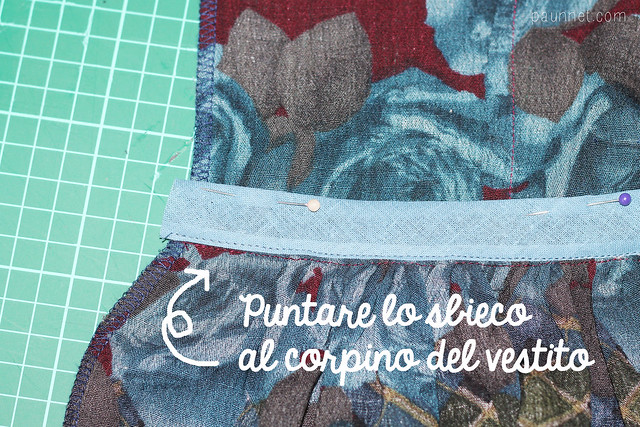
1. Fold down the bodice of the dress so it's out of the way, and pin your bias tape through both seam allowances, very close to the seam. If you're using a slippery fabric or you're not very experienced, you might also want to baste before you move to the sewing machine.
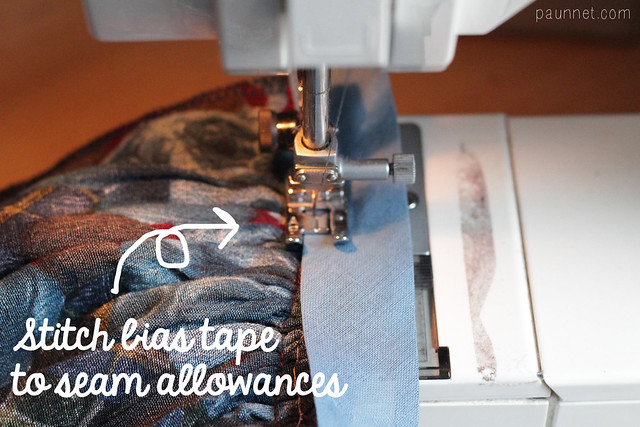
2. Edgestitch the bias tape to the seam allowances all along the waist seam; be careful not to catch the bodice in the seam.
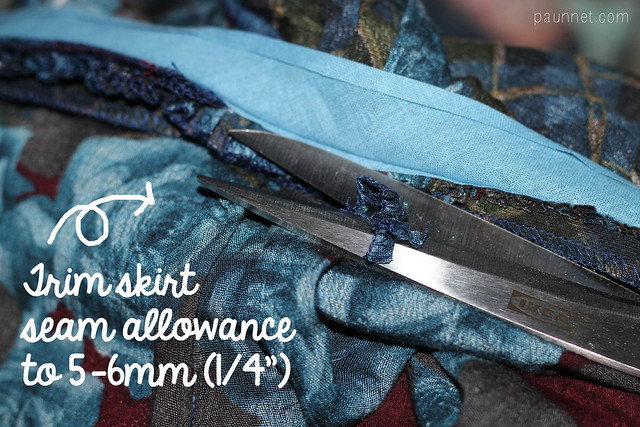

3. Now trim the skirt seam allowance down to 5-6mm (1/4"). You don't want to trim too close to the seam (I went a little overboard) or you will weaken one of the most important seams of your dress.
If your fabric is very bulky, you might want to also trim down the seam allowance of the bodice; in this case, grade the seam allowances.
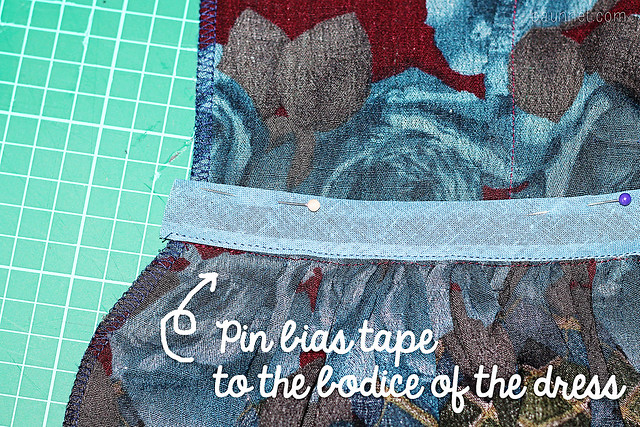
4. Fold the bodice up again, and give a good press if needed. Pin (and baste, if you need more security) the bias tape to the bodice.
At this point you have two choices: you can either machine stitch or hand stitch the bias tape. Hand stitches are easier to conceal on the right side but are time consuming. Machine stitches are visible on the right side but are much faster.
If you decide to use your sewing machine (like I did in this case), remember to use a bobbin thread that matches your fabric and, as you sew, to slightly pull the bodice perpendicularly to the seam to avoid sagging.
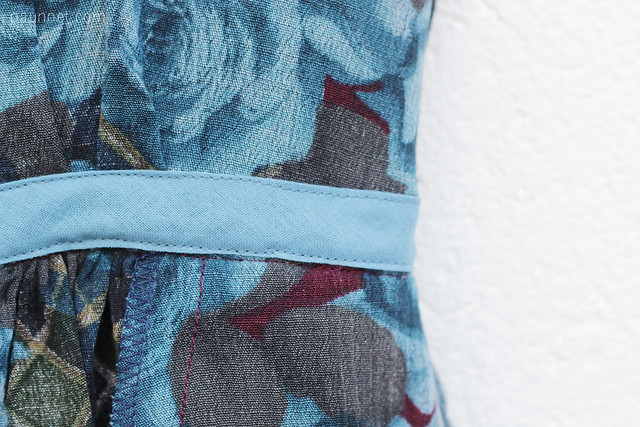
This is how it looks on the inside...

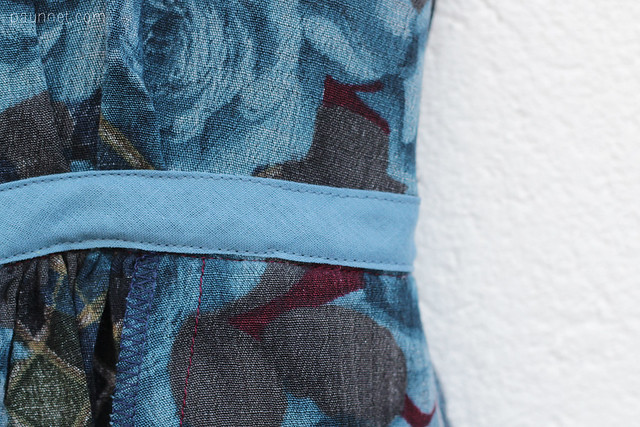
... and on the outside.

Once the dress is worn, the seam is not very visible, especially if you're using a dark fabric (more photos of the dress here).
I hope this tutorial will be useful, please let me know if you try this technique!
Tutorial: rifinire la cucitura in vita di un abito con lo sbieco

Oggi, come promesso, vi mostro la tecnica che uso con i vestiti che hanno troppo spessore alla cucitura in vita. In questo modo, eliminate dello spessore indesiderato e rifinite la cucitura in un sol colpo!
Si tratta di una tecnica semplicissima, vedrete; l'unico materiale necessario è circa un metro di sbieco (la quantità è pari alla lunghezza della cucitura in vita del vostro abito).

Questo è il punto della costruzione da cui volete iniziare: il corpino e la gonna dell'abito sono stati cuciti insieme, ma non c'è ancora la lampo.
Non ho nemmeno rimosso alcuni fili di imbastitura usati per arricciare la gonna, tanto andremo a tagliare il margine di cucitura.
Assicuratevi che i margini di cucitura siano stirati verso l'alto.
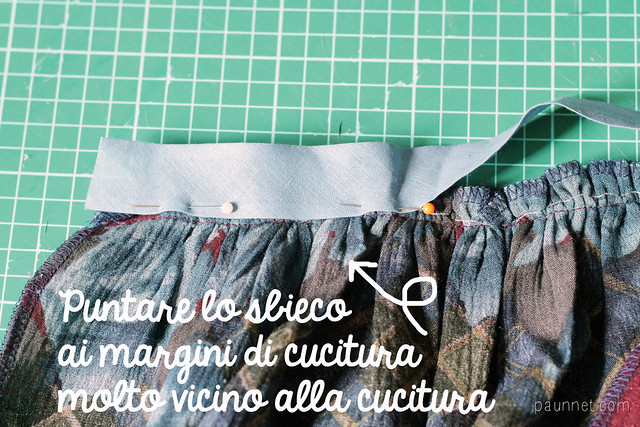
1. Tirate giù il corpino in modo che non sia d'intralcio e puntate lo sbieco sui margini di cucitura, posizionandolo molto vicino alla cucitura. Se la vostra stoffa è poco maneggevole o non siete molto esperte, imbastite lo sbieco prima di passare alla macchina da cucire.
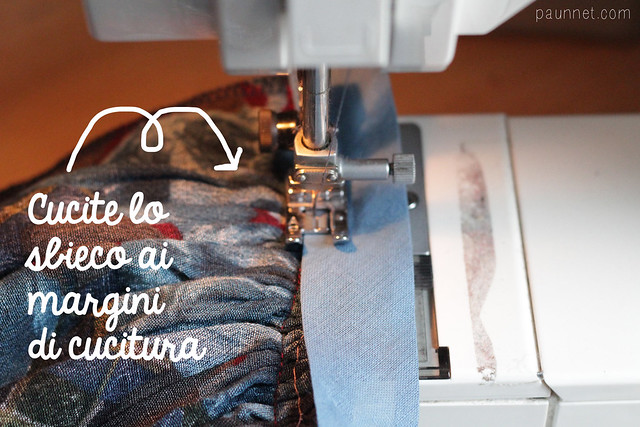
2. Cucite lo sbieco ai margini di cucitura lungo tutta la vita, mantenendovi il più vicino possibile al bordo dello sbieco stesso. Fate attenzione che il corpino non finisca per sbaglio nella cucitura (succede!).

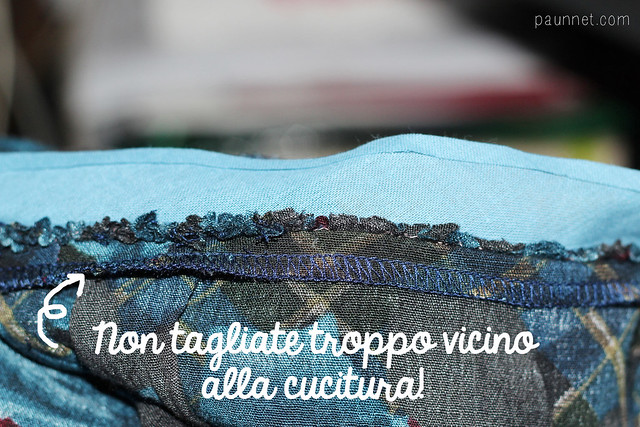
3. Ora tagliate il margine di cucitura della gonna e riducetelo a 5-6mm. Non tagliate troppo vicino alla cucitura (come potete vedere io ho un po' esagerato) o indebolirete una delle cuciture più importanti dell'abito.
Se state lavorando con una stoffa molto spessa, potete ridurre anche il margine di cucitura del corpino.
4. Riportare il corpino nella sua posizione e, se necessario, date una bella stirata. Puntate (e, se necessario, imbastite) lo sbieco al corpino.
A questo punto avete due scelte: cucire a macchina o a mano. Se cucite a mano, è più facile nascondere i punti sul diritto, ma ci vorrà più tempo. Se cucite a macchina, i punti saranno visibili dal diritto, ma ci metterete meno tempo.
Se decidete, come ho fatto io qui, di cucire a macchina, ricordate di usare un filo per la bobina abbinato alla stoffa e di tirare un pochino il corpino perpendicolarmente alla cucitura mentre cucite per evitare che la stoffa rimanga allentata tra la cucitura in vita e quella dello sbieco.
Questo è il risultato al rovescio...

... e al diritto.
Una volta indossato il vestito, la cucitura non è granché visibile (altre foto di quest'abito qui).
Spero che questa tecnica via sia utile, fatemi sapere se la utilizzerete!
What a great tutorial! I'll keep it int mind. It's also a great way if you line the bodice to attache the lining to the skirt without adding bulk
ReplyDeleteGreat tutorial, thanks!
ReplyDeletethis is a great idea! i will definitely be using it!
ReplyDeleteThis is such a great technique! I'll be using this more almost all of my dresses from now on! :) thank you!
ReplyDeleteI definitely need to keep this tutorial in mind for my next dress!
ReplyDeletegreat idea!! It makes the seam look so much nicer!! I'll definitely be using this, thanks! :)
ReplyDeleteThank you for the tutorial, it is very useful and clear
ReplyDeleteThanks Anna! A clear and simple tutorial. I'll definitely use this in one of my future dresses!
ReplyDeleteThank you for such clear instructions! This is really helpful, I will definitely use this!
ReplyDeleteThanks very much for this great tutorial! I generally suck at making clean seam finishes inside my dresses, so I'll make sure to give it a try on the next dress I sew!
ReplyDeleteThanks for the tutorial - I'll have to give this a try on my next dress!
ReplyDeleteGreat tutorial thank you! I'm definitely going to try this for a nice smooth finish, I love tidy insides!
ReplyDeleteNice!! A great alternative to serging!
ReplyDeleteGorgeous finish!! And a beautiful dress!! I've linked to your tutorial on Craft Gossip: http://sewing.craftgossip.com/tutorial-finish-a-waist-seam-with-bias-tape/2014/01/29/
ReplyDelete--Anne
That is a lovely dress! :--) And thanks for the tutorial!
ReplyDeleteLovely tutorial! And I do love this dress. :)
ReplyDeleteThis is a great tutorial!
ReplyDeleteHello Anna, Just to let you know, I actually used your tutorial in my last "Vintage Pledge" Vogue dress. I can see it here : http://sundayafternoon.canalblog.com/archives/2014/04/21/29709577.html
ReplyDeleteThank you and have a nice day !
Camille
Thanks for sharing! Your dress is gorgeous! :D
ReplyDeleteThank you for the lovely tutorial! I used it on my last dress and it was perfect! I'll definitely be using it again!
ReplyDelete