Tuesday, March 22, 2016

Sewing Around the World - Schnittchen Katja shirt


Pattern: Katja shirt by Schnittchen
Size: 38
Alterations: none
Fabric: striped jersey viscose + lace trim c/o Supercut

Today I'm happy to present my project for Sewing Around The World, an idea of German indie pattern company Schnittchen involving 12 sewing blogger from different countries throughout 2016.
I'm following Silvia from Germany who sewed the Joanna coat and Julie from France, with the Lola cardigan.

My own pick was the Katja shirt, a knit kimono top with a relaxed fit, an optional triangular appliqué and two different length options (I used the shorter one). The pattern is available both as a PDF and as a printed pattern, at very affordable prices, and has instructions in either German or English. 

So... Why did I choose this pattern?
To be completely honest, it was the result of compromise. I LOVED the patterns that the two previous bloggers chose, so they were not an option.
The other patterns I liked didn't have English instructions (such as the Nina pants) and I also wanted something easy and quick to sew, because I thought I would be knee deep in moving into my new home in March (which is not the case yet... don't ask).

I'm also always up for trying new silhouettes that are out of my comfort zone (meaning, basically anything that doesn't have a cinched waist).

Am I happy with my Katja shirt?
Uuunnnh... Yes and no.
These are the things I like:
  • The comfort: while I don't think this is particularly flattering on me, I can't deny it's really comfortable and snuggly. After taking these photos in the late afternoon, I didn't take it off until I changed in my PJs.
  • The V: I think it makes the shirt unique and gives you the possibility to use many trims.
    I chose lace, but Supercut also sent me some gold piping that would have looked pretty nice with it.
    At the same time, it's an appliqué, so it will add weight to the shirt and it will make the neckline seam significantly more bulky.
    If you don't like the V, it's optional, so you can forget about it.
  • The milted corners: Katja has little slits on the side seams and they are finished with milted corners, which are easy to sew but give a super nice finish.

This viscose is not the easiest to sew.
I gave up matching stripes on the sides after unpicking a couple times, out of frustration.
Now, for the things I don't like:
  • The pattern: Multiple parts of the pattern do not match, specifically the front and back sides and the shoulder of the appliqué with the main shirt.
    I am getting more and more picky with patterns ever since starting taking patternmaking classes, but things not matching up are really annoying, period, no matter how skillful you are.
    Also, the neckline band is cut on the bias and that's unnecessary, unless you're using a knit with very little stretch.
    EDIT: Silke, creator of Schnittchen patterns, explains:
    "
    Concerning the bias tape: this pattern piece had to be constructed as bias tape because you can sew Katja also with cotton so to say with fabrics without ANY elastic. So we had to construct the neckline band as bias. This is also the reason for the quite wide neckline...Concerning the side seams: the length of the side seams fit perfectly, however we had to construct the curve in the front side seam different to that in the back because we left out the darts in the front pattern piece. So these (the darts or better to say the width of the darts) were "turned" to side seam. We needed to do this because in the front piece you have to have more width because of the busts.."
    (More in the comment section)
  • The fit: this is JUST personal preference, but this shirt has a lot of ease and I just don't like it. It makes me look so much bigger than I am.
    The neckline is too wide (again, for my taste), and the bottom is flared, which I don't think is too flattering on this length.
  • The instructions: the instructions that come with the pattern are VERY essential. You might not care in the least for this, but I do like my instructions to be clear and thorough, especially for beginners patterns. I guess this has to do with the affordable price of the pattern: more pages and illustrations = higher costs.
    Schnittchen does offer a photo tutorial for Katja (which I could only find in German), and that's great, but that means you need a device and an Internet connection while you sew. 
All in all, I enjoy my finished top but I think this pattern could use some improvements. 
If you like a loose fit, and are looking for a comfy top pattern with unique details at a reasonable price, this might be the one for you!

Thanks Schnittchen for including me in this beautiful tour, I'm really grateful :D

*** This post is sponsored by Schnittchen ***


Modellomaglia Katja di Schnittchen
Taglia: 38
Modifiche: nessuna
Tessutojersey di viscosa a righe + nastro in pizzo c/o Supercut

Oggi, sono lieta di presentarvi il mio progetto per Sewing Around The World, un'idea della compagnia indie tedesca di cartamodelli Schnittchen, a cui partecipano, cucendo modelli di questo designer, 12 blogger di cucito da tutto il mondo durante il 2016.
Io seguo Silvia dalla Germania che ha cucito il meraviglioso cappotto Joanna e Julie dalla Francia, con il cardigan Lola.

La mia scelta è ricaduta sul top Katja, una maglietta a kimono con vestibilità molto rilassata, un'applique triangolare opzionale e due diverse opzioni di lunghezza (io ho tagliato la più corta). 
Il modello è disponibile sia come PDF che in versione stampata, a un prezzo piuttosto conveniente, e le istruzioni sono disponibili in tedesco o inglese. 

Ma quindi... Perchè ho scelto questo modello?
Ad essere completamente sincera, è stato il risultato di un compromesso. Mi piacevano moltissimo i due modelli usati dalle ragazze prima di me (ma non potevo fare una ripetizione); gli altri modelli di mio gusto non avevano le istruzioni in inglese (tipo i pantaloni Nina) e inoltre volevo qualcosa di rapido da cucire, perchè al momento della scelta pensavo che a marzo sarei stata fino al collo in mezzo al trasloco (cosa che per vari motivi non è ancora successa, stendiamo un pietoso velo). 

Infine, accetto sempre di buon grado nuove "sfide" per quanto riguarda le silhouette da indossare (nel mio caso, qualsiasi cosa non sia stretto in vita).

Mi piace il mio top Katja?
Eeeeeeehhh... Sì e no.
Queste sono le cose che mi piacciono: 
  • La comodità: anche se trovo che questo top non mi valorizzi particolarmente, non posso negare che è estremamente comodo e coccoloso. Dopo aver scattato queste foto nel tardo pomeriggio, non me lo sono tolto finché non sono andata a dormire, e l'ho scambiato col pigiama.
  • La V: Trovo che renda il top unico e che ti dia la possibilità di usare un sacco di passamanerie. Io ho optato per il pizzo, ma Supercut mi aveva anche mandato del profilo dorato che sarebbe stato carinissimo.
    Allo stesso tempo, ricordate che la V è un applique, e quindi aggiungerà peso al top e renderà la cucitura dello scollo più spessa.
    Però, se a voi non piace, è assolutamente facoltativa.
  • Gli angoli squadrati (tipo tovaglia): Katja ha degli spacchetti nelle cuciture dei fianchi rifinite con angoli quadrati (per intenderci, quelli con la diagonale). Sono semplici da cucire e danno veramente una bella finitura. 
Questa viscosa non è semplicissima da cucire.
Dopo aver scucito i fianchi un paio di volte, mi sono rassegnata al fatto che le mie righe non avrebbero corrisposto
(troppa frustrazione per fare altrimenti!)
E ora, le cose che non mi piacciono:
  • Il modello: ho trovato più pezzi del modello che non combaciavano; i peggiori erano il fianco davanti e dietro, ma anche l'applique non combacia sulla spalla del pezzo davanti.
    Mi rendo conto che da quando studio modellistica sono più esigente, ma si tratta di controlli basilare che una modellista dovrebbe fare sempre, e mi dà veramente fastidio trovare questo genere di errore in un modello commerciale.
    Inoltre, la striscia per lo scollo viene fatta tagliare in sbieco, cosa completamente inutile a meno che il vostro tessuto sia veramente poco stretch.
  • La vestibilità: si tratta di gusto personale, ma questo top ha veramente tantissima vestibilità. Avrei tranquillamente potuto tagliare due taglie in meno e avere una maglia comunque comoda. Così larga proprio non mi piace, specialmente con questa svasatura piuttosto pronunciata sul fondo.
    Sempre a proposito di gusto personale, non mi piace lo scollo, troppo largo per essere così alto.
  • Le istruzioni: le istruzioni incluse nel modello sono MOLTO stringate. Magari a voi non importa e preferite cucire senza nemmeno guardarle, ma a me piace che le istruzioni siano complete e dettagliate, specialmente se si tratta di un progetto per principianti (che hanno bisogno di essere guidati).
    Immagino però che la questione sia legata al prezzo piuttosto basso del modello: più pagine e illustrazioni o foto = costo più elevato.
    Schnittchen offre comunque un fototutorial per Katja (che però ho trovato solo in tedesco), ed è fatto molto bene, ma ciò significa che voi dobbiate avere a disposizione un dispositivo e una connessione internet mentre cucite. 
Tutto sommato il risultato non mi dispiace (lo indosserò in situazioni di comfort), ma credo che il modello avrebbe bisogno di una messa a punto.
Se a voi piacciono i top loose e volete un modello per una maglia comoda e con dettagli particolari a un prezzo contenuto, magari Katja fa per voi!

Grazie ancora a Schnittchen per avermi incluso in questo tour del mondo!

*** Questo post è sponsorizzato da Schnittchen ***

Monday, March 14, 2016

Deer and Doe's Lupin Jacket


Size: 38
Alterations: None
Fabric: some kind of lightweight wool (might be crepe?) and poly lining from my stash.
Last week, Deer and Doe released their new Spring-Summer 2016 patterns and I don't know about you, but I'm really, really excited by these three new designs, like I haven't been for a while.
Meaning, I generally like almost anything coming from this brand (if you've ever read my blog, you'll know); but this time I want to sew multiple versions of every single pattern, which means I'm really in love.

Shirt and skirt are self drafted and me-made
Shirt's fabric is Atelier Brunette via Supercut
So, when Eléonore contacted me in January asking me if I wanted to test anything, I wasn't actually too inclined to do it (due to a serious lack of spare time), but when she showed me the line drawings of the new designs, and I saw the Lupin jacket, I HAD to make it.

In the words of the creator herself: "Hybrid between Letterman and double-breasted motorcycle jackets, Lupin has two large draped panels on the front and optional shoulder tabs that add a bit of sophistication, while the waistband and cuffs keep it sportswear." (source)
This really is a great little jacket, extremely versatile, stylish and cute. And I'm so pumped it works so well in combination with high-waisted skirts, a staple in my everyday wardrobe.
I was as much in love with the line drawing as I am with the finished result, which, if you sew, you know it's something that does not always happens (unfortunately).

Lupin also looks much scarier to sew than it actually is.
The welt pockets can be intimidating, but they just call for precision and a stable fabric. And maybe a practice run (or two) before you cut into your jacket.
They're very well explained in the instructions, and if that shouldn't be enough, you can watch a Youtube tutorial such as this one (in French, was referred to the testers by Eléonore while she was preparing the instructions, and it's perfectly clear and helpful).

The pockets of this jacket are a little bit small for me, but it's a matter of personal taste (I like my pockets very roomy).
If you feel this might be the case for you as well, you can just lay your hand on the pocket pattern piece, and lengthen it by a couple cms if you want.

As mentioned before, the instructions for Lupin are great (as they always are with Deer and Doe), I just have a couple notes:
  • Attaching the waistband and cuffs: the instructions have you sewing waistband and cuff to the wrong side of the jacket, and then fold and topstitch them in place on the right side. If you're not an experienced sewer, or your fabric is a bit bulky (like my wool was), I would recommend you sew them to the right side, fold the edge on the wrong side, baste in place and topstitch on the right side. It will make sure you get a very nice result, with no gaps or uneven edges.
  • Topstitching the "lapels": I think Eléonore will mention this on the Deer and Doe blog soon, but if press the whole center front towards the lining and topstitch it in one motion, the topstitching looks "wrong" when the lapels are folded down. It's basically a matter of "turn-of-cloth" (read more here). This is a more advanced tailoring technique, but it definitely makes a huge difference.
What do you think, guys?
Do you like Lupin or do you prefer the other new patterns? Which one is your favorite?

And most of all... Do I need a second Lupin in a more Spring-y fabric? (Because I really want one...)


Modello: Giacca Lupin di Deer and Doe
Taglia: 38
Modifiche: nessuna
Tessuto: una lana leggera (potrebbe essere crepe, credo) e fodera, entrambe dalla mia riserva personale
La settimana scorsa, il marchio indie francese Deer and Doe ha lanciato tre nuovi modelli per la collezione Primavera-Estate 2016 e, non so voi, ma io sono esaltatissima da questi nuovi design. Generalmente, mi piace quasi tutto quello che proviene da questa firma (e se non siete nuovi sul blog, non è sicuramente una novità), ma stavolta vorrei cucire versioni multiple di ogni modello, il che è un chiaro segnale del fatto che sono innamorata.
Gonna e camicetta sono fatte a mano con modelli disegnati da me.
Il tessuto della camicetta è Atelier Brunette e viene da Supercut.
Quando Eléonore mi ha chiesto a gennaio se volessi fare da tester per qualcosa, io non ero molto dell'idea (a causa di una mancanza cronica di tempo libero), ma dopo che mi ha mostrato i disegni dei nuovi modelli, e ho visto Lupin, non potevo proprio tirarmi indietro. 

Lupin è un ibrido tra la giacca Letterman e le giacche biker a doppio petto; ha due grandi pannelli drappeggiati sul davanti e epaulette (come si chiamano in italiano?) opzionali che danno un tocco sofisticato, mentre la cintura e i polsini mantengono uno stile sportivo.  


Si tratta davvero di una gran bella giacchina, estremamente versatile, molto carina e con uno stile spiccato.
Sono contentissima di quanto sta bene con le gonne a vita alta, che sono praticamente la mia divisa.
Per una volta sono tanto innamorata del capo finito, quanto lo ero del disegno originale (e se cucite, sapete che non è una cosa che succede sempre, purtroppo).

Lupin sembra molto più complicata di quello che è da cucire.

Le tasche a filetto, che spaventano tutti, richiedono semplicemente molta precisione e un tessuto stabile... E magari che facciate qualche prova prima di tagliare la vostra giacca.
Sono spiegate molto bene nelle istruzioni, ma se non vi dovessero bastare, potete guardare un tutorial su Youtube come questo (in francese, consigliatoci da Eléonore in fase di test, lo trovo estremamente chiaro e ben fatto).

I sacchi tasca di questa giacca sono un po' piccoli per i miei gusti (mi piacciono le tasche spaziose). Se temete che possa essere così anche per voi, mettete la mano sul pezzo del modello del sacco tasca, e, eventualmente, potete allungarlo/ingrandirlo di un paio di cm.

Ci sono solo due cose che aggiungerei alle istruzioni di Lupin:
  • Come attaccare cintura e polsini: le istruzioni prevedono di attaccarle dal rovescio, rigirare il margine e impunturare dal diritto. Se non siete troppo esperte o avete un tessuto non troppo collaborativo, vi conviene attaccarle dal diritto, rigirare il margine al rovescio e imbastirlo, e impunturare al diritto. 
  • Impunturare i revers: si tratta di una tecnica un po' avanzata e Eléonore dovrebbe parlarne prossimamente nel blog di Deer and Doe, ma in teoria la parte del revers andrebbe stirata e impunturata in direzione inversa al resto del centro davanti e dello scollo. Si tratta di una questione un po' difficile per me da spiegare a parole e su cui trovate delle informazioni in inglese in questo articolo, se volete approfondire.
E allora, voi che ne dite?
Vi piace Lupi o preferite gli altri nuovi modelli? Qual è il vostro preferito?

Ma soprattutto... Secondo voi mi dovrei fare una versione più primaverile di Lupin? (perché io la vorrei un sacco...)

Saturday, December 12, 2015

Burdastyle Magazine 01/2016

Source
Hey, guys!
I haven't written a Burdastyle review in SUCH a long time, and I've been thinking about it lately, so here I am!
It's also the first issue of 2016, so if I were looking for signs, that would be perfect. :)

As I said, it's been a very long time, and I haven't really followed the magazine in the meantime, to be honest.
Collecting material for this review, I didn't really expect for Burda to have changed much in the last year or so, and I wasn't wrong.

My personal taste also hasn't changed that much, although, as a pattern making student, my perception and knowledge regarding design has. I'm still no expert, but I can now see and understand things I just didn't.

So, let's begin, shall we?

Ok, let me start on a positive note, with a cute little dress.
I really like the pleated neckline and the overall silhouette, although I'm not a huge fan of the curved panel on the skirt. I can't figure out if it's functional for the drape, or if it's decorative, or what.

And this one... I'm not a huge fan of the sleeves (the position of the cuffs in particular), but I like the gathered shoulder yoke and I'll never not like a pussy bow. :)

I've always identified as a huge outerwear lover, and this coat is no exception.
I like the unusual collar and the pleat in the shoulder yoke, although I'd love to see the photos better (I guess you can see much better on the printed magazine). 


Eh.
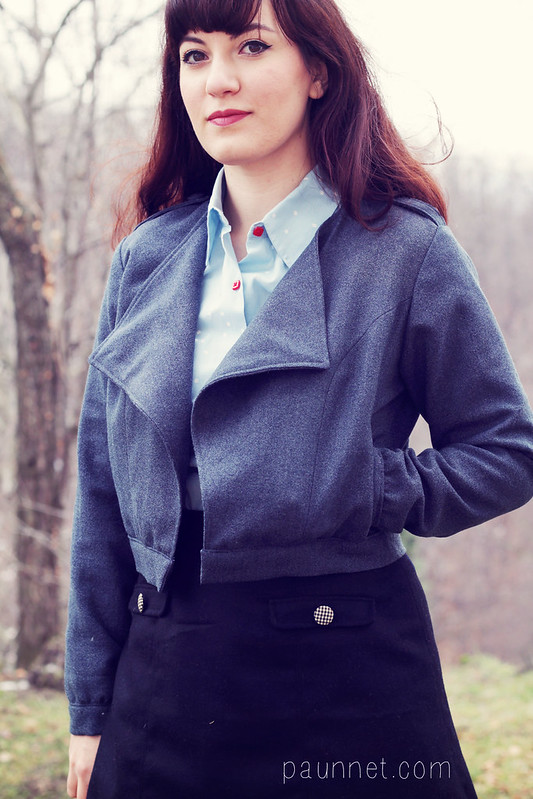
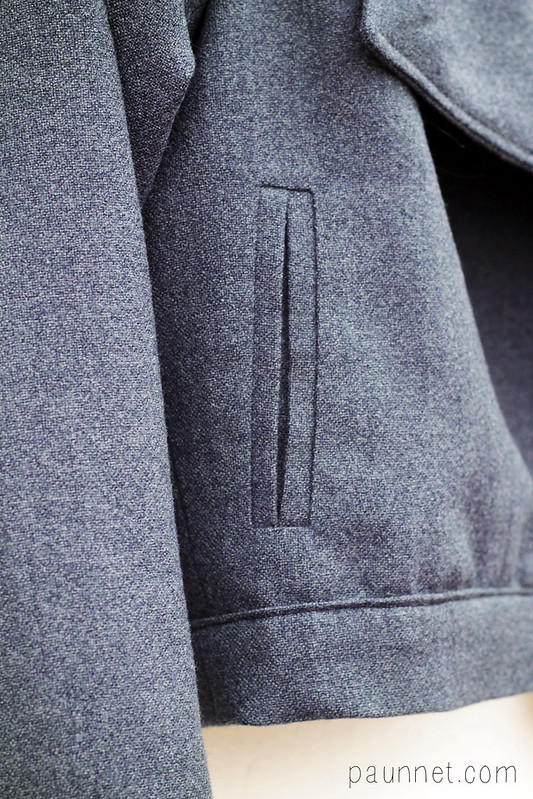
I kinda like the short version of this jacket (although it looks a bit boxy) and I think the longer one might have been cute, but cutting off the collar like that is just weird.


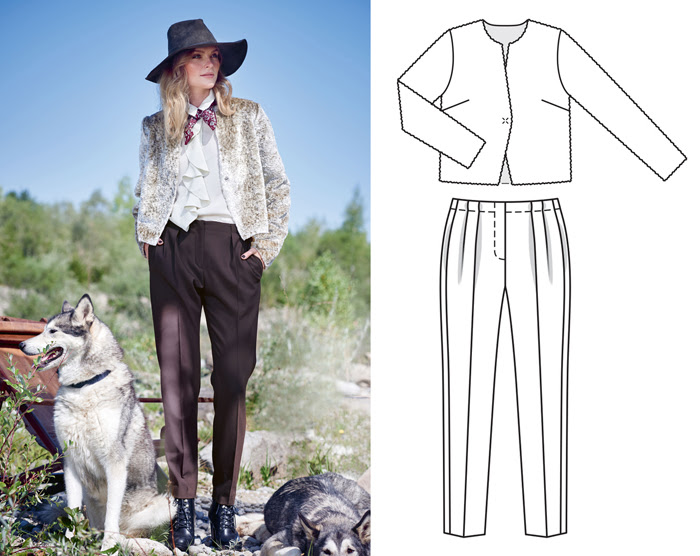
I wanted to include more pics from this photoshoot because there are two ADORABLE dogs, but these were are the only noteworthy patterns for me.
The jacket is extremely simple (but that also means versatile) and I really like the pants, although I'm not too sure about the waist treatment (bulky?).


At a first glance, this skirt reminded me of the Gabriola skirt by Sewaholic, but they're not very similar at all.
I hate the contrasting fabric they used here, other than that, like all long skirts, I like it a lot in photo and on other people, but I just can't seem to wear one. 


Meh.
It's not a bad dress for beginners, but they totally lost me with the cowl in the back + a panel underneath.
I don't like it, and with the wrong fabric, that's a lot of bulk on your back (= unconfortable).


I really like this outfit. As far as I can like PJs or loungewear, which I'm not that passionate about.
But hey, these two have a few interesting elements and... style?, to make them kinda cute.

AHAHAHAHAHAHAHHAHAHAHAAHAH

Now, a vintage pattern.
Not a fan of this one.
It looks so heavy for a dress... That center front placket just bugs me and so does that very high neckline.

As it's often the case, most of the plus-size section for this month is really classy and cute.
I LURVE this coat and I would make it immediately!
I don't know why, but I'm extremely drawn by peak lapels... It's a mistery.

The fabric choice is not the most fortunate (look at that hem!), but it's a cute, super simple pattern for beginners, with a couple design details (the neckline yoke and the sleeve slit) that make it a little different.

Mmh. This is where, again, I'm lost.
It looks pretty terrible on the model, that underbust panel thing-y is doing her no favors, nor does the diamond panel... I also wonder if the sleeves/wings are sewn to each other up to some point, otherwise she'll show her bra to everyone every time she moves her arms.

And of course, the beginning of the year, in Europe, means children costumes (Fasching/Carnival being in February), which are not bad at all this time.
Not incredibly trendy, though, so they might not be for the fussier little ones.


So, more than a year went by since I last looked at Burda, and pretty much nothing has changed (as I mentioned earlier).

It's still a magazine that, in exchange for a very affordable price, offers a large number of patterns, a few of those being cute or even beautiful, and a lot of them being either ugly, boring or not in your size range.
Might I remind that the patterns presented in a ridiculously complicated sheet, with no seam allowance included, scarce instructions and rare to nonexistent illustrations.
I don't think I need to add I still prefer indie designers by a lot, and it makes me a bit sad that Burda still doesn't show signs to want to change or (at least in Italy) open up to the sewing community (which is something I sadly experienced at a recent craft fair, where the Burdastyle Italia team was extremely dismissive and cold to indie designers, to the point of being rude).

For these reasons, I don't even know if it makes sense to keep writing these reviews, although I sincerely enjoy writing them just to have some fun and be a bitch, just as I would be chatting with friends.

What do you guys think?
Have you ever bought the magazine, or do you keep buying it?

[All images in this post come from here]

Thursday, October 29, 2015

My Book - Il Mio Libro


Soooo... Uhm, yeah.
I wrote a book!

One of the reasons why I've been more distant than the usual from the Internet in this last year, is because I was offered this incredible opportunity by Italian publishing house Gribaudo, and I just couldn't pass it up!

And so, after many months of hard work, "Il Manuale del Cucito" ("The Sewing Handbook") was born. It's a cute little book for beginners, it is project-oriented, including a short section dedicate to techniques and FAQ about sewing, and then 20 projects to learn how to sew while you're making them. The projects range from accessories, to clothes and home decor objects (there's also an accessory for dogs, because -duh!- I had to include dogs in it).

The idea was to offer something for everyone, without making it so difficult that it would discourage a beginner, but at the same time challenging enough so that it wasn't banal and you would learn some new techniques.
Also, there's no taking ourself too seriously in this book. Everything is as colorful as possible, and there are little animals, polka dots and smily faces scattered everywhere, which is, of course, perfectly my style.
I tried to keep the instructions as clear as possible (also thanks to Daniela Capparotto, my editor, and her very insightful input) and there are step-by-step photos to guide you through every technique.

Speaking of photos, a huge thanks goes to my photographer Mauro Aluffi, who challenged himself with something he never did before (he's a very talented pre-natal, baby and child photographer), and was a great help throughout the whole process.

Together with his photography, the book is punctuated with Ilaria Faccioli's super cute illustrations, which just added the perfect touch to the whole thing.

Also, a huge thanks goes to that magical creature who's Gaia Segattini, whose help was fundamental since before the beginning of this enterprise. By the way, her crochet book, "Il Manuale dell'Uncinetto" ("The Crochet Handbook") is released on the same date, for the same handmade book series, and it's seriously amazing (I want to make every single project included in it).

And finally, I have to mention my beloved fabric store Supercut and its fantastic owner Marine, who was the sponsor for the fabric in the book, and contributed to make it more beautiful. Thank you!

I'm sorry I've been so secretive about it until now, but it was a difficult and stressful process, and I really wanted to be ready both logistically and psychologically before announcing it officially here on my little blog (although am I ready for this? Am I?!). All in all, it was a challenging, but incredibly satisfying experience :)

The book is launching on November 5th, and, for the moment, it's to be released only in Italian (but who knows?!). 


Dunque... ecco. Alcune di voi lo sanno già, la maggior parte invece no, ma...
Ho scritto un libro!!!

Uno dei motivi per cui sono stata più distante del solito dal blog e da Internet in generale nell'anno passato è a causa di questa incredibile opportunità che mi è stata offerta dalla casa edtrice Gribaudo  a cui proprio non potevo rinunciare!

E così, dopo mooolti mesi di intenso lavoro, è nato "Il Manuale del Cucito", un libro per i principianti incentrato sui progetti, che include una parte di teoria e di domande/risposte sul cucito e poi 20 progetti per imparare a cucire mentre si cuce. Sono inclusi accessori (ovviemente uno è anche per i cani, non potevo non includerli), qualche semplice capo d'abbigliamento e oggetti per il decoro di interni.

L'idea di base era quella di offrire qualcosa un po' per tutti i gusti, mantenendo il tutto non troppo difficile (in modo da non scoraggiare un principiante totale), ma abbastanza particolare da non essere banale e da permettere di imparare delle nuove tecniche.
Importante: questo libro non si prende affatto sul serio. Tutto è il più colorato possibile, ci sono animaletti, pois e faccine ogni tre per due (perfettamente nel mio stile), poichè l'intento non è tanto quello di far diventare la lettrice una sarta profescional, quanto quello di instillare l'amore del cucito e la voglia di buttarsi in questo hobby che non è poi così complicato come potrebbe a volte sembrare.

Il tutto è pensato per essere più semplice e il più accessibile possibile (grazie anche a Daniela Capparotto, la mia editrice, per il prezioso aiuto), dalle istruzioni alle foto step-by-step.


E a proposito di foto, un grande ringraziamento va al mio fotografo Mauro Aluffi, che si è messo in gioco con qualcosa che non aveva mai fatto (è un bravissimo fotografo prenatale, di neonati e bambini; mamme del nordovest non scordatevi il suo nome!), ed è stato di grande aiuto durante tutto il lavoro.

Insieme alle sue foto, il libro è punteggiato dalle adorabili illustrazioni di Ilaria Faccioli, la vera e propria ciliegina sulla torta.

Inoltre, un ringraziamento ENORME va a quella magica creaturina che è Gaia Segattini, il cui auto è stato fondamentale fin da prima dell'inizio dei lavori. Tra l'altro, sta per uscire anche il suo nuovo libro, "Il Manuale dell'Uncinetto" che fa parte della stessa collana di Gribaudo "handmade per imbranati" ed è FE-NO-ME-NA-LE (voglio sferruzzare tutti i progetti inclusi nel libro).

Infine, non posso non menzionare il mio amato Supercut e la sua meravigliosa proprietaria Marine, che hanno agito da sponsor per i tessuti del libro, contribuendo a dargli una marcia in più. Grazie di cuore!

Mi spiace di essere stata così silenziosa a riguardo finora, è stato un processo lungo, difficile e stressante e volevo essere pronta a livello logistico e psicologico prima di annunciarlo qui (perchè adesso sono pronta?! Mmmh....). Alla fine dei conti, è stata un'esperienza non semplice, ma estremamente soddisfacente :)

Dimenticavo: il libro esce il 5 Novembre (la settimana prossima!!!).