Saturday, February 8, 2014

February Featured Sponsor: Urban Cut

Today, I'm really pleased to have a little chat with Stefanie, owner of German-based pattern shop, Urban Cut, and my newest sponsor.

✄ Please tell us more about yourself (where you're from, hobbies, if you like to sew, etc.)
Hi! I'm Stefanie and I live near the wonderful city of Munich. In 2009 I started to sew and have never stopped ever since. Two years later I started a blog, where I still share my sewing projects.
At the beginning I sewed a lot of breadbaskets and bags. Nowadays I mainly sew my own clothing.

Source
✄ What made you decide to open Urban Cut?
Last spring, I hosted a sew along together with Alex from Mama Macht Sachen. I wanted to sew the the Robson Coat from Sewaholic and ordered the pattern in Canada. Unfortunately, the pattern got lost on the way to Germany.
I searched for online shops in Germany to get the pattern in time for the sew along, but I didn't find one. So I decided to change this and to do it myself :-) 

✄ What's the sewing world like in Germany?
There's a great sewing community in Germany, represented by fantastic blogs of wonderful seamstresses. We have a lot of great sewing events, for example the "Me Made Mittwoch" just to mention one - the self made wednesday, where we present our self-made outfits, worn in our everyday life. That's a great source of inspiration and my to-sew list gets longer every week.

✄ How did you select the products for your shop?
I would be lying if I said that my personal taste doesn't have an impact on which products I choose ;-)
I try to have patterns for all levels of sewing experience so that you can find patterns for beginners up to advanced seamstresses. My personal goal is to find new patterns to expand my offer continuously.

✄ What do you see in the future of Urban Cut?
I hope I still discover new designers and can provide wonderful patterns to my customers.
At the moment most of my customers live in Germany, but there is a growing number of orders from different european countries. I'm very happy that my offer appeals to seamstresses and I hope to keep gaining popularity all over Europe.


Thank you, Stefanie!
If, like me, you live in Europe, you might not like to buy patterns from across the Ocean because of shipping costs and time; I usually purchase from the UK, but Germany is closer to me and shipping costs are usually cheaper, so new shops like Urban Cut are a win-win for me!

For those of you who want to do the same, here's a discount code kindly provided by Stefanie:

Enjoy!

Wednesday, February 5, 2014

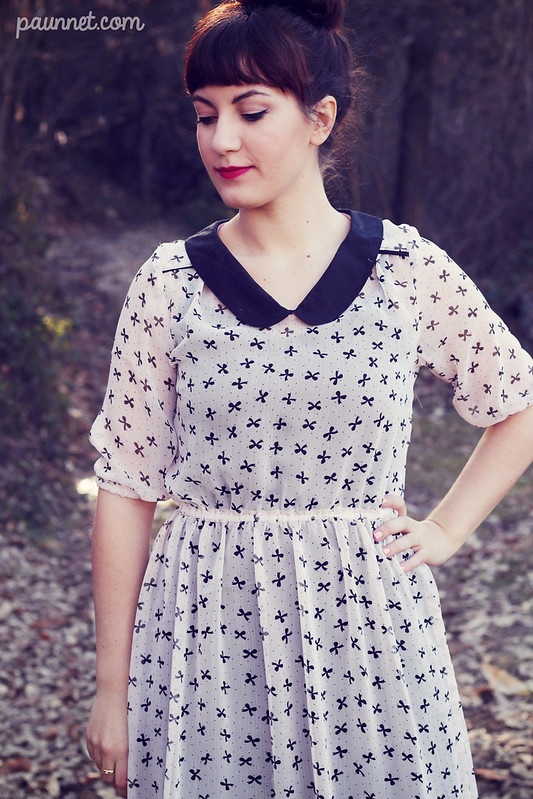
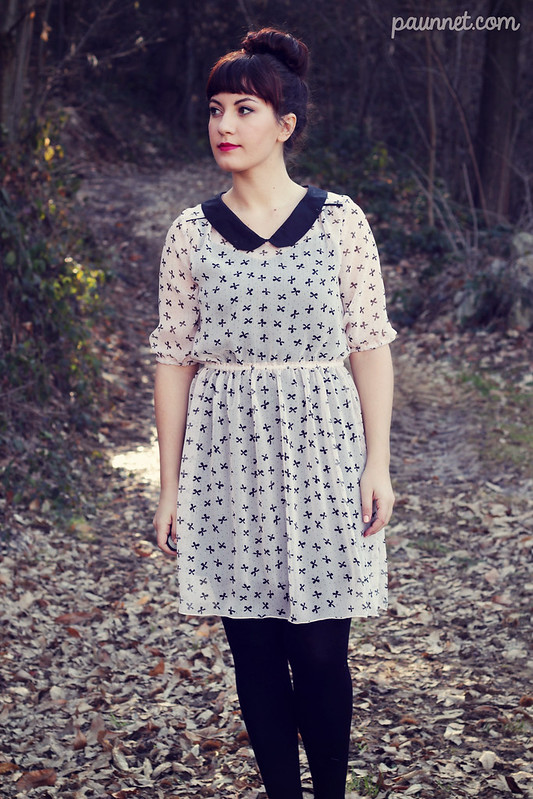
A super girly Airelle dress

Size: size 38
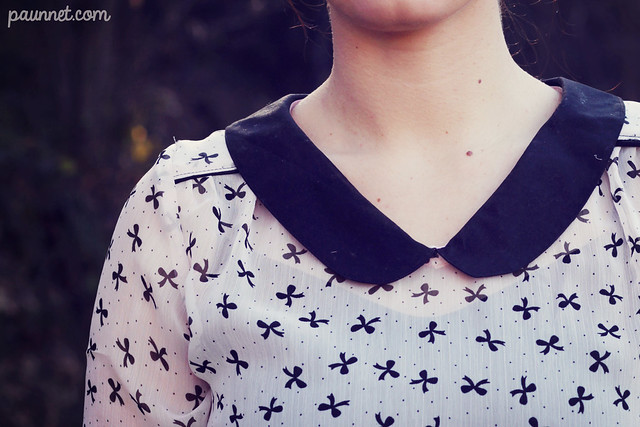
Alterations: turned the collar into a Peter Pan shape; omitted the darts, added the skirt panels of the Sureau dress.
Fabric: black cotton poplin form my stash; bow-printed chiffon from Wholeport.

*This post contains affiliate links*
It's a rainy, gloomy week and I don't feel like blogging, but I've been quite productive lately and I'd hate to have project photos pile up just because I'm lazy.

So here's one of my latest makes, a variation of Deer and Doe's Airelle blouse. I love this pattern to pieces, but my first two attempts (1 and 2) weren't very successful. My main mistake was fabric choice, both were too stiff for this garment. And because I also wear dresses much more than separates, I decided that for my next attempt I would make it into a dress.

I received this fabric as part of the blogger sponsorship program at Wholeport and I thought it would be perfect for a dreamy, super feminine version of Airelle. This chiffon wasn't exactly easy to work with, but it does look incredibly cute.

One of my favorite things of this pattern is how well the collar is drafted, it perfectly lays on the shoulders.
One piece of advice, though: don't skip the facing! I hate facings and I replace them with bias tape every time I can, but in this case, the bias tape will really complicate your life and it will be very difficult to make the neckline look neat on the inside.

And that's it! To be honest, this is not my favorite dress ever, but I do like it nonetheless and it fits quite seamlessy into my wardrobe.
What would you have made with this chiffon?

Taglia: taglia 38
Modifiche: transformato il colletto in Peter Pan; omesso le pince; aggiunto la gonna dell'abito Sureau.
Tessuto: popeline nero dalla mia collezione; chiffon con stampa a fiocchi di Wholeport.

*Questo post contiene link di affiliazione*
Che brutto tempo, questa settimana! Piovoso e malinconico, mi ha tolto qualsiasi voglia di scrivere! Ma visto che sono stata piuttosto produttiva ultimamente, mi spiacerebbe lasciare accumulare le foto dei miei ultimi progetti solo perché sono pigra, perciò ecco una delle mie ultime fatiche: una variate della blusa Airelle di Deer and Doe.

Amo moltissimo questo modello, ma i miei primi due tentativi (1 e 2) non sono stati di successo. Per entrambi ho usato della stoffa troppo rigida, che li rendeva scomodi; inoltre, indosso molti più abiti che separati, perciò sapevo che il mio tentativo seguente avrebbe dovuto essere una trasformazione in abito.

Ho ricevuto questa stoffa come parte del programma di sponsorship di Wholeport e ho pensato subito che sarebbe stata perfetta per una versione ariosa e super femminile di Airelle. Questo chiffon non è molto semplice da tagliare e da cucire, ma è veramente carinissimo.

Una delle mie cose preferite di questo modello è il colletto, che cade perfettamente sulla curva del collo.
Un consiglio, però: usate la paramentura! Io odio le paramenture e le sostituisco appena posso con lo sbieco, ma in questo caso vi complichereste la vita e non avreste un interno ben rifinito.

Ed è tutto! A essere sinceri, non è il mio abito preferito di sempre, ma mi piace comunque ed è una buona aggiunta al mio guardaroba.
Voi che cosa avreste fatto con questo chiffon?

Thursday, January 30, 2014

La Mia Boutique 02/2014

After a few months of collaborating with Silvia on LMB reviews, I'm back on my own! Silvia and I had a lot of fun writing these posts together, but they took A LOT of time, so finally I decided to go back to my usual way.
In the meantime, we postponed the review for the January issue more and more, until it didn't make a lot of sense to write it anymore; it wasn't a great issue anyway, so it's not a big loss, but you can see the technical drawings here. 

So, from now on, you'll see less patterns featured in these posts, only a selection of those about which I have something to say. I hope that's ok :)

Despite the frowning, duck-faced model (seriously, what the F is up with her?), the issue begins with a stunning coat. The huge collar reminds me of something from the 50's and the shape is spectacular. Unsurprisingly, this is a design by Chiara Boni.

The styling here makes me want to cry, but what a cute dress! Two big bows like these might be a lot to pull off for many people, but the rest of the dress is so simple that I think they work.

Again a design by Chiara Boni, this very elegant, very interesting bolero paired with a pretty boring bustier dress by Laura Mancini. This bolero reminds me a bit of the Victoria Blazer by By hand London, a pattern I've actually never thought could work on my body shape.

Definitely not a dress for everyone and for every day, but nonetheless quite stunning and definitely attention-seeking. The pattern pieces for the sleeves are HUMONGOUS, and in fact you need as much fabric for them as for the rest of the dress.

Next is a photoshoot inspired by tartan with a styling so tragic I'm not even gonna try and comment on it.
This coat pattern is extremely cute, and there's also a variation with patch pockets and without the fur pieces which I like even better. It reminds me a bit of the Anise coat by Colette patterns.

I don't remember why I included this fugliness, but here it is. Both designs feel incredibly outdated, especially those pants with an elastic waist. I can't... And to think they're a creation by acclaimed designer Aspesi...

More cute outerwear! This is definitely an advanced pattern, though. I love the big collar and princess seams at the back.

Cute outfit, no? The jacket is very Chanel-chic and the skirt would actually be great for a pregnant woman, since it has a very wide waistband made of knit material.

And finally: lingerie! I guess the previous patterns were popular. I haven't caught the lingerie bug just yet, but I really love the second set, especially the lines on the bra (although it doesn't look like it provides quite enough support for me).

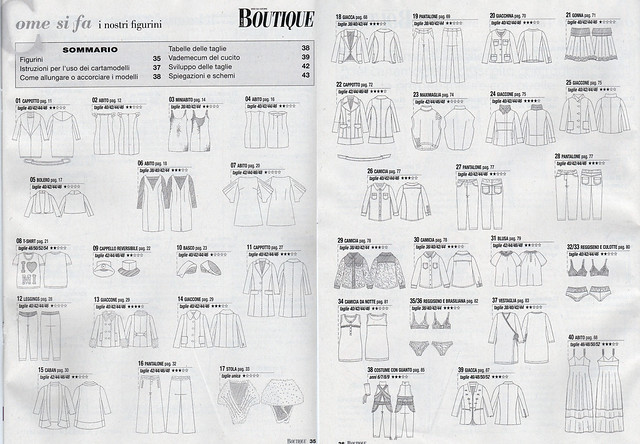
Aaand... that's it! Here is the rest of the patterns of this issue (full size here):

I'm really looking forward to next month's issue, which is going to include designs by Makola (who made the May 2013 issue the best ever)!

Avete comprato questo numero di LMB? Che ne pensate?

Monday, January 27, 2014

Plantain Babydoll Dress Variation

Size: size 38
Alterations: transformed the t-shirt into a dress with this tutorial
Fabric: mistery knits from my stash

Hey, guys!
Let's start the week with some news I'm really, REALLY excited about: guess who's going to write for the English version of the Deer and Doe blog? Oh, yeah!
I'm going to write some tutorials and explore some pattern variations, yay! My first project was a babydoll dress based on the (free!) Plantain pattern. You can read the tutorial here.

I've been wearing more and more loose clothes lately, so this dress fits perfectly in this new frame of mind. The low neckline and the fitted shoulders make it flattering and feminine, but the babydoll style means it's incredibly comfortable, and versatile too. I've been wearing this both in and outside the house, and it's perfect for both.

The version you see here was a test, made with some cheap knits with my stash, while for the dress you can see on the Deer and Doe blog I was lucky enough to work with some organic jersey from Les Trouvailles d'Amandine. Oh my goodness, that fabric puts to shame all the cheap stuff I've been working with, it's sooo soft, great both to wear and to work with. Not to mention, being quite the ecowarrior, I love the philosophy behind it.

Speaking of Plantain... Have you guys been working your own version? There just a few more days to enter the competition, so hurry up! :)

Taglia: taglia 38
Modifiche: ho trasformato la t-shirt in abito, come illustrato in questo tutorial.
Tessuto: due jersey dalla composizione sconosciuta dalla mia collezione.

Ciao a tutti e buon lunedì!
Vorrei cominciare la settimana con una notizia di cui sono felicissima: indovinate un po' chi scriverà per il blog inglese di Deer and Doe da ora in poi? Eggià!
Sarò l'autrice di qualche tutorial e mostrerò qualche variazione dei cartamodelli esistenti, e il mio primo progetto è un vestito basato sul modello (gratuito!) della t-shirt Plantain. Potete leggere il tutorial completo in inglese qui, e in francese qui.

Ultimamente ho iniziato ad indossare sempre più capi d'abbigliamento un po' più ampi, e questo abito in stile babydoll ricade perfettamente nella categoria. Lo scollo basso e le spalle aderenti lo rendono femminile, mentre la gonna ampia è estremamente comoda. Ho indossato quest'abito sia in casa che fuori, ed è perfetto per una moltitudine di circostanze.

La versione che vedete qui è una prova fatta con del jersey poco costoso che avevo in casa, mentre per la versione per il blog Deer and Doe ho avuto la fortuna di lavorare con del jersey bio di Les Trouvailles d'Amandine. Che stoffa fantastica, fa veramente impallidire il jersey da poco che ho utilizzato finora. E' morbidissima, un piacere sia da cucire che da indossare. Senza contare che, essendo io un po' un'eco-warrior, apprezzo molto la filosofia del suo negozio.

E a proposito di Plantain... State lavorando sulla vostra versione? Questi sono gli ultimi giorni per partecipare alla competizione, perciò sbrigatevi! :)

Thursday, January 23, 2014

Tutorial: How to Finish a Waist Seam with Bias Tape (Faux Waist Stay Tutorial)

Hey guys!
As promised, here's the little tutorial to show you how I finish the inside of dresses with a bulky waist seam. It will reduce some unwanted bulk and give you a clean, beautiful finish, all in one!

It's a super easy technique, you'll see; and the only notion you need is about 1m of bias tape (as much as your waist seam measures).

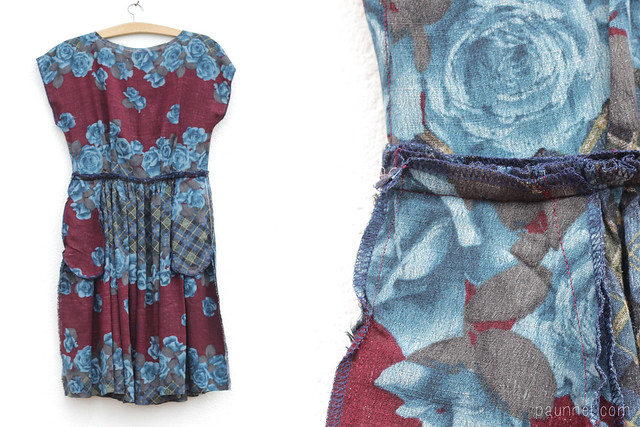
This is the stage of construction you want: the bodice and the skirt of the dress have been joint, but there still isn't a zipper. This dress has a center back zipper, but this technique will work on a side zipper as well.
I didn't even care to remove some of the basting threads I used to gather the skirt because we are going to trim the seam allowance anyways.
You want the seam allowance of the waist seam to be pressed upward.


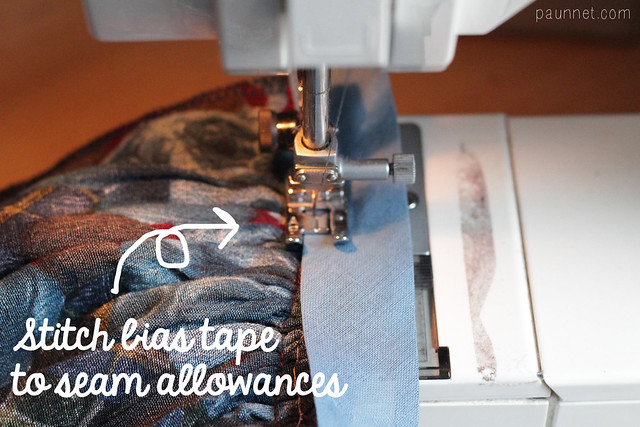
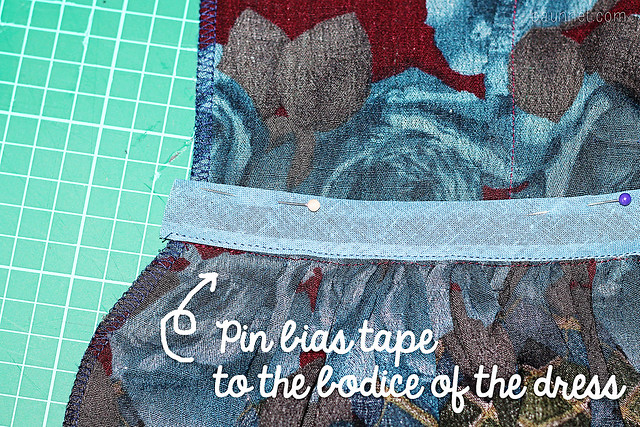
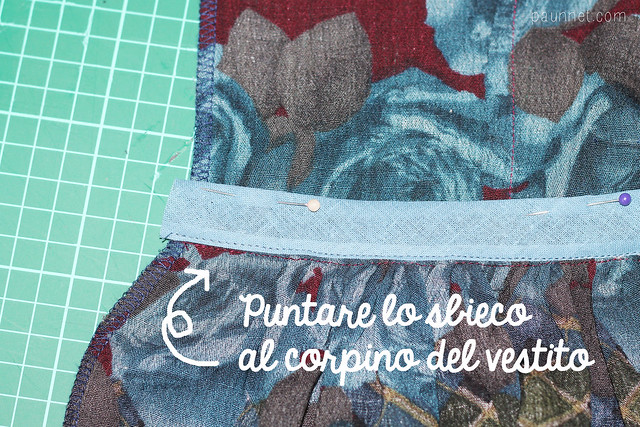
1. Fold down the bodice of the dress so it's out of the way, and pin your bias tape through both seam allowances, very close to the seam. If you're using a slippery fabric or you're not very experienced, you might also want to baste before you move to the sewing machine. 

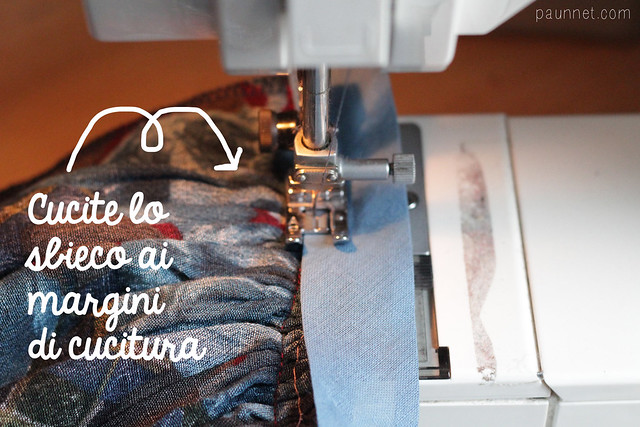
2. Edgestitch the bias tape to the seam allowances all along the waist seam; be careful not to catch the bodice in the seam.

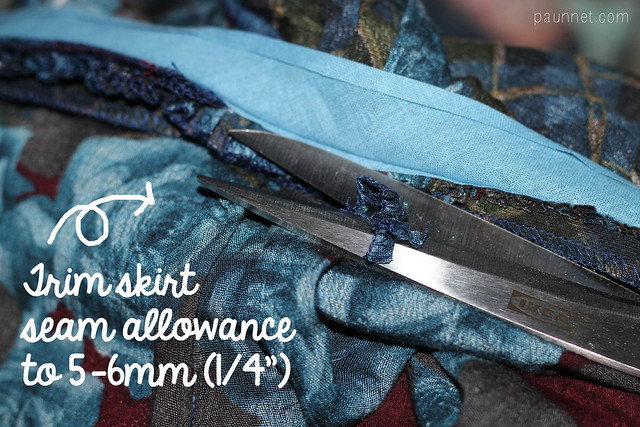
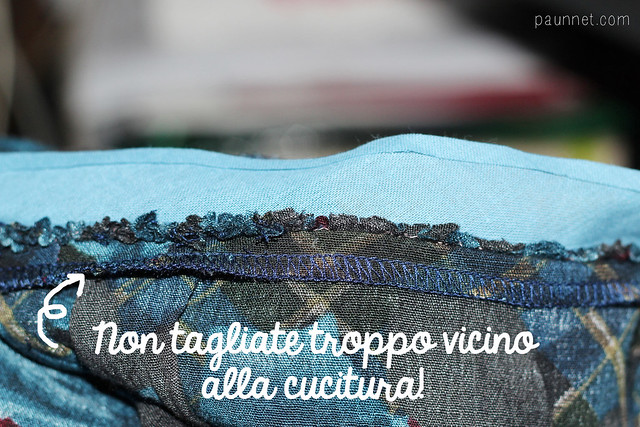
3. Now trim the skirt seam allowance down to 5-6mm (1/4"). You don't want to trim too close to the seam (I went a little overboard) or you will weaken one of the most important seams of your dress.
If your fabric is very bulky, you might want to also trim down the seam allowance of the bodice; in this case, grade the seam allowances.

4. Fold  the bodice up again, and give a good press if needed. Pin (and baste, if you need more security) the bias tape to the bodice.
At this point you have two choices: you can either machine stitch or hand stitch the bias tape. Hand stitches are easier to conceal on the right side but are time consuming. Machine stitches are visible on the right side but are much faster.
If you decide to use your sewing machine (like I did in this case), remember to use a bobbin thread that matches your fabric and, as you sew, to slightly pull the bodice perpendicularly to the seam to avoid sagging.

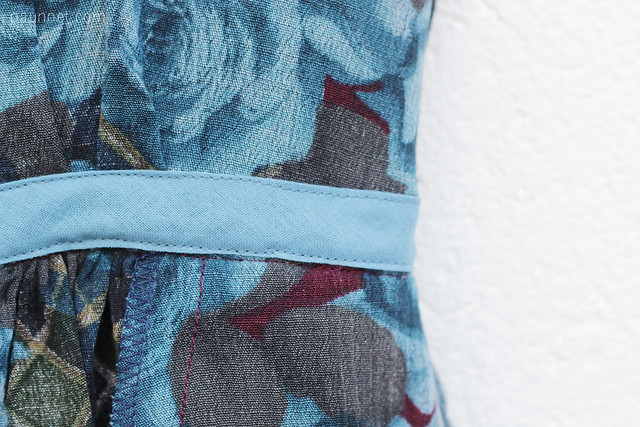
This is how it looks on the inside...

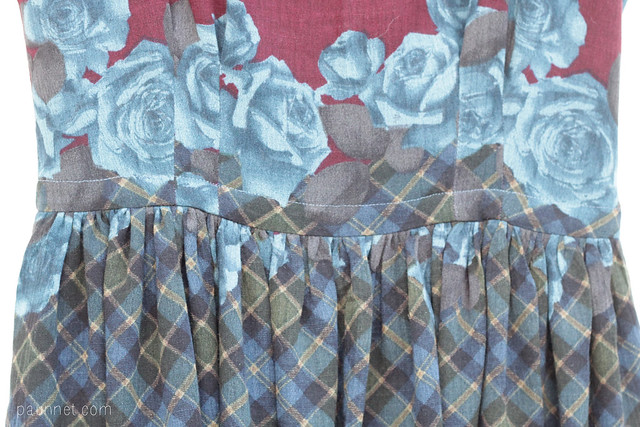
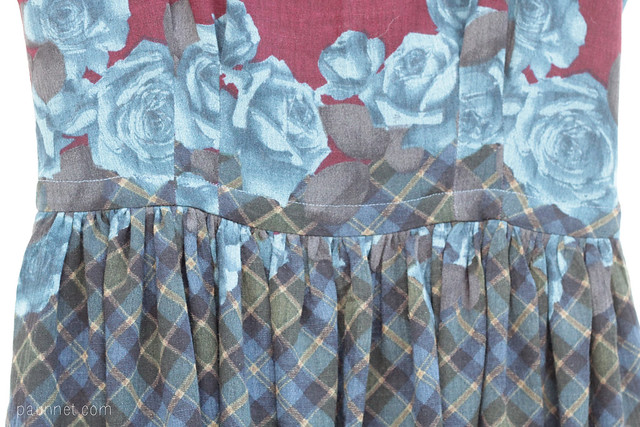
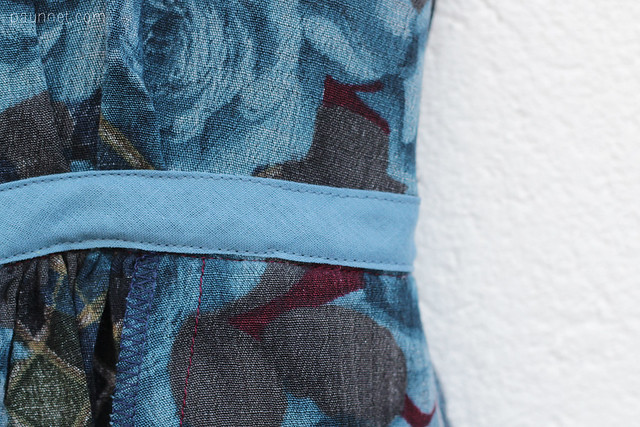
... and on the outside.

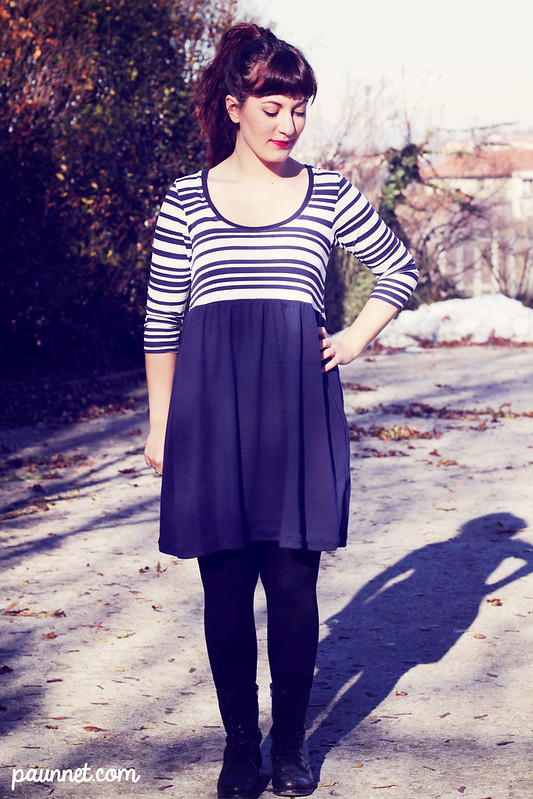
Once the dress is worn, the seam is not very visible, especially if you're using a dark fabric (more photos of the dress here). 

I hope this tutorial will be useful, please let me know if you try this technique!


Tutorial: rifinire la cucitura in vita di un abito con lo sbieco

Ciao!
Oggi, come promesso, vi mostro la tecnica che uso con i vestiti che hanno troppo spessore alla cucitura in vita. In questo modo, eliminate dello spessore indesiderato e rifinite la cucitura in un sol colpo!

Si tratta di una tecnica semplicissima, vedrete; l'unico materiale necessario è circa un metro di sbieco (la quantità è pari alla lunghezza della cucitura in vita del vostro abito).

Questo è il punto della costruzione da cui volete iniziare: il corpino e la gonna dell'abito sono stati cuciti insieme, ma non c'è ancora la lampo.
Non ho nemmeno rimosso alcuni fili di imbastitura usati per arricciare la gonna, tanto andremo a tagliare il margine di cucitura.
Assicuratevi che i margini di cucitura siano stirati verso l'alto.


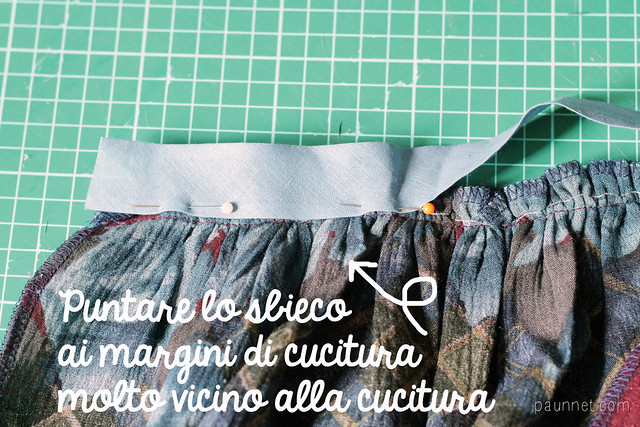
1. Tirate giù il corpino in modo che non sia d'intralcio e puntate lo sbieco sui margini di cucitura, posizionandolo molto vicino alla cucitura. Se la vostra stoffa è poco maneggevole o non siete molto esperte, imbastite lo sbieco prima di passare alla macchina da cucire.

2. Cucite lo sbieco ai margini di cucitura lungo tutta la vita, mantenendovi il più vicino possibile al bordo dello sbieco stesso. Fate attenzione che il corpino non finisca per sbaglio nella cucitura (succede!). 

3. Ora tagliate il margine di cucitura della gonna e riducetelo a 5-6mm. Non tagliate troppo vicino alla cucitura (come potete vedere io ho un po' esagerato) o indebolirete una delle cuciture più importanti dell'abito.
Se state lavorando con una stoffa molto spessa, potete ridurre anche il margine di cucitura del corpino.

4. Riportare il corpino nella sua posizione e, se necessario, date una bella stirata. Puntate (e, se necessario, imbastite) lo sbieco al corpino. 
A questo punto avete due scelte: cucire a macchina o a mano. Se cucite a mano, è più facile nascondere i punti sul diritto, ma ci vorrà più tempo. Se cucite a macchina, i punti saranno visibili dal diritto, ma ci metterete meno tempo.
Se decidete, come ho fatto io qui, di cucire a macchina, ricordate di usare un filo per la bobina abbinato alla stoffa e di tirare un pochino il corpino perpendicolarmente alla cucitura mentre cucite per evitare che la stoffa rimanga allentata tra la cucitura in vita e quella dello sbieco. 

Questo è il risultato al rovescio...

... e al diritto.

Una volta indossato il vestito, la cucitura non è granché visibile (altre foto di quest'abito qui).

Spero che questa tecnica via sia utile, fatemi sapere se la utilizzerete!