Showing posts with label skirt. Show all posts

Wednesday, July 8, 2015

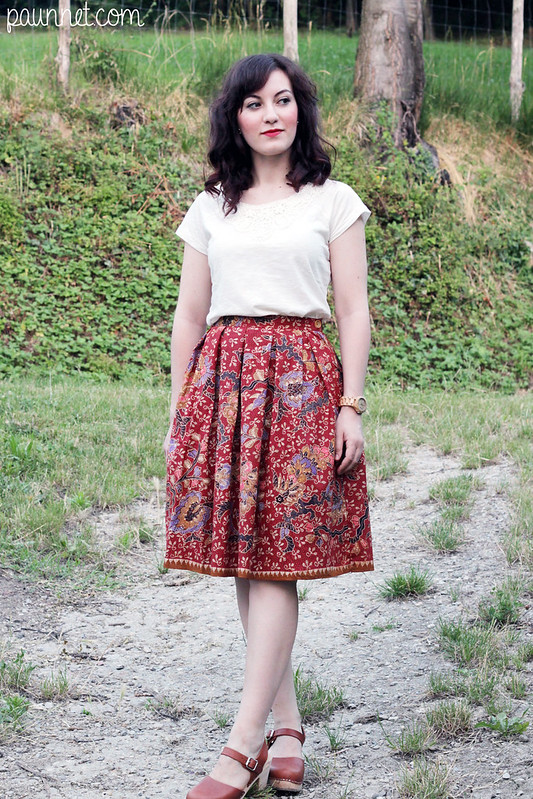
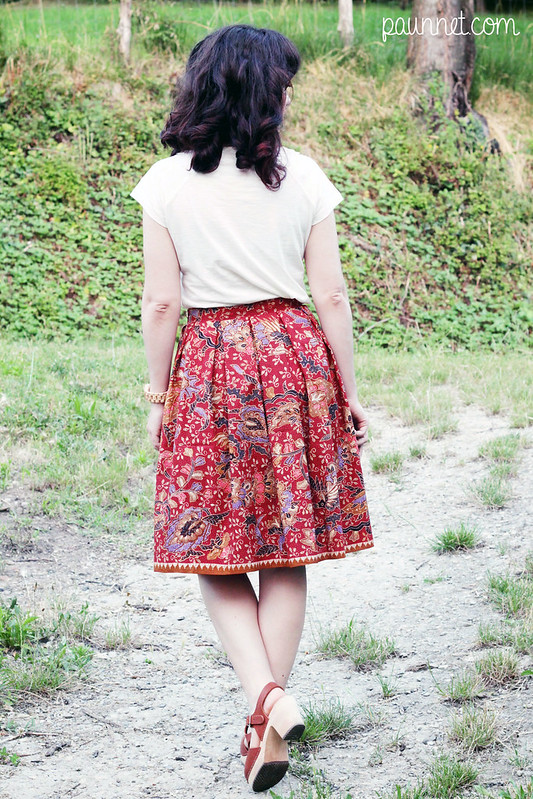
I'm back! With a red skirt...

Pattern: self drafted (not much drafting involved, though...)
Fabric: vintage sarong-type cotton gifted to me years ago

Hullooooooo! Guess who's still alive?
Joking aside, I'm finally back with a post on my beloved, yet neglected blog, and I hope to be able to get back to posting at a more regular pace. Maybe not twice a week, but not disappearing for months on end either...

So, where have I been all this time?
Nowhere, really, it's just that real life has been extremely busy since... well, since last year. I just didn't have enough time, energy and motivation to spend on the blog.

The thing is, I started a professional pattern drafting class in February last year; I have to commute to attend, and I've been working two jobs to be able to afford it, AND my boyfriend and I have started remodeling his late grandma's house to eventually move in it together, so I've been pretty burn out in real life to entertain my virtual one.

I'll tell you more about my classes in future posts (especially because I definitely want to document my school work), but for the moment, I just want to say IT'S AMAZING.
At 27 (now 28), it wasn't easy to decide to go back to being a student, meaning not being able to work full time and a whole other series of sacrifices, but I feel like a new person. I'm finally doing something I truly love and makes me feel fulfilled, and I feel like I'm on the right track. 
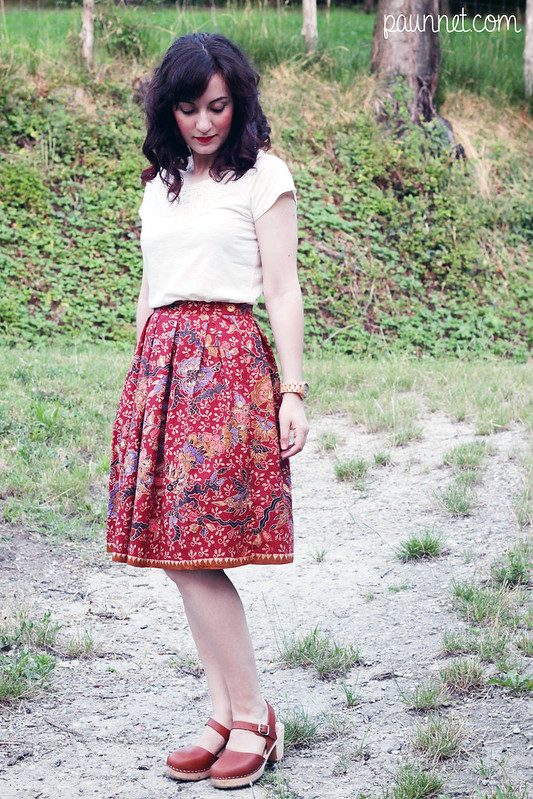
Clogs: Lotta from Stockholm
Anyways, why back now?
Things have not really changed that much, although I quit one of my two jobs and I'm about to start my summer break from class, so I will have a little extra free time for the moment. And I missed the blog and you guys too much to go on keeping to myself :D

Enter: the two-hour-skirt. Last Sunday I had the urge to make something quick and rewarding, so I grabbed one of the vintage fabrics my father-in-law gifted me (you can also see them in action here and here) and decided to make a skirt.

When making a pleated skirt, you can either:
- use you skirt sloper, slash it and add the pleats;
- or you want to use some math (waist measurement/2 + seam allowance + [measurement of single pleat] * number of pleats).
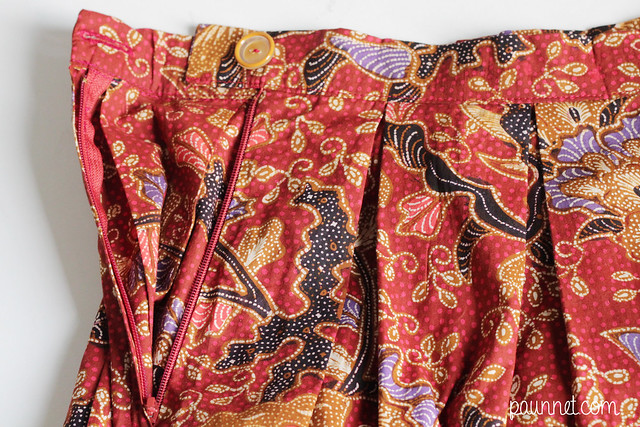
Honestly, I didn't do either. I cut two panels in the width of the fabric (in my case, 110cm), long as much as I wanted the skirt to be (56cm+1cm for waist seam allowance; I didn't need hem allowance because of the border print).
I then proceeded to pleat the fabric starting from the center; I made box pleats with a depth of 6cm + 6cm each. After pleating the whole panel, I measured it, and cut away the excess from the side.
It can be a wasteful method (although I had to cut less than 5cm from each side because my fabric was so narrow to start with), but it's definitely a fast one. 
I sewed the side seams, added a zipper on the left side, added a straight waistband and a button... and voila, done!
I didn't even need to hem it!
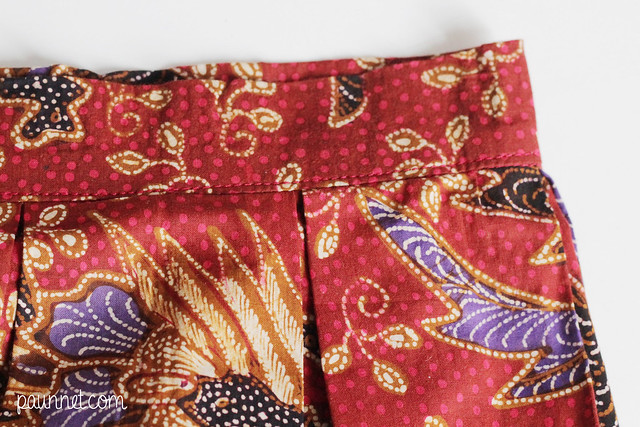
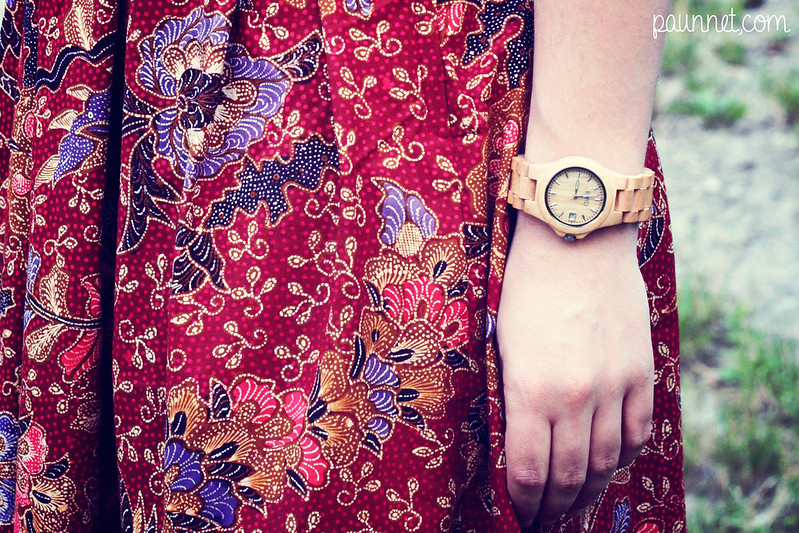
I love the deep red of this fabric, and its luscious print; I'm really happy with the final result! As a personal preference, I tend to gravitate toward complicated designs with many details, but I'm learning that keeping it simple can often be the best things :)


One last thing... Do you like my watch? Because I'm pretty much in love with it.
It's by Jord and yes, it's made of wood (maple, actually). I don't think I've ever received so many compliments for an accessory! My mum has even already picked one as a gift for her next birthday.
The company sent it to me, and I usually refuse any "free-merchandise-in-exchange-for-a-feature" kind of deals, but this just proves how much I liked their products, and I'm honestly glad I accepted. Furthermore, the guys at Jord offered one watch to giveaway to my readers, so if you do like it, stay tuned, because a giveaway is coming soon :)

Modello: fatto da me (anche se non si può parlare propriamente di modello...)
Tessuto: cotone vintage tipo batik, regalatomi anni fa.

Ciaoooo! Indovinate chi è ancora viva?
Non posso credere di essere finalmente tornata a scrivere un post sul mio tanto amato quanto trascurato blog... Evviva! E torno anche con le migliori intenzioni di rimettermi a postare regolarmente, magari non due volte a settimana, ma cercando almeno di non sparire di nuovo per mesi e mesi.

E quindi, dov'ero finita?
Da nessuna parte, in realtà, è solo che sono stata incredibilmente impegnata nella "vita reale" da... beh, praticamente dall'anno scorso. Semplicemente non avevo abbastanza tempo, energie e motivazione da investire nel blog.

Il fatto è che ho iniziato un corso professionale da modellista a febbraio dell'anno scorso, che è lontano da casa e quindi mi richiede di viaggiare. Ho iniziato a fare due lavori part time per permettermi tale corso e in più, con il mio ragazzo, abbiamo iniziato a ristrutturare casa per andarci a vivere insieme in un futuro (speriamo) prossimo. In sostanza ero troppo esaurita nella vita reale per mandarne avanti una virtuale. 
Vi dirò di più del mio corso in futuro (anche perchè voglio documentare quello che sto facendo a scuola), ma per il momento vi basti sapere che è FICHISSIMO.
A 27 anni (ora 28), non è stato semplice decidere di tornare a studiare, e di conseguenza non poter avere un lavoro a tempo pieno e tutta un'altra serie di sacrifici, ma mi sento veramente una persona nuova. Finalmente sto facendo una cosa che amo, e sento di aver intrapreso un percorso giusto per il mio futuro. 

Zoccoli: Lotta from Stockholm
Ma alla fine, perché sono tornata proprio adesso?
A dire il vero, la mia situazione personale non è cambiata poi così tanto rispetto a ciò che ho appena descritto, anche se ho lasciato uno dei miei due lavori e sto per iniziare la pausa estiva scolastica, il che significa maggior tempo libero, per ora. E sinceramente, mi mancava troppo il blog per continuare a lasciarlo in questo desolante silenzio. 

E quindi entra in scena: la gonna fatta in due ore. Domenica scorsa avevo il bisogno fisico di produrre qualcosa in maniera veloce e soddisfacente, perciò ho preso uno dei meravigliosi tessuti vintage che mi aveva regalato mio suocero (li potete vedere in azione qui e qui) e ci ho fatto una gonna.

Per fare una gonna a pieghe, potete:
- usare la vostra base della gonna (se ne avete una), fare dei tagli verticali e inserire le pieghe;
- oppure usare una semplice formula matematica (misura della vita/2 + margini di cucitura + [misura di una piega] x numero delle pieghe) per ottenere uno dei due pannelli che vi serviranno.

Io, sinceramente, non ho fatto nessuna delle due cose. Ho tagliato due lunghezze del mio tessuto nella misura della lunghezza della gonna (56cm+1cm per il margine di cucitura del cinturino; non mi serviva calcolare l'orlo poichè intendevo utilizzare la stampa sul bordo del tessuto).
Ho poi piegato il tessuto partendo dal centro, formando delle pieghe baciate di 6cm di profondità. Dopo aver piegato un pannello, ho misurato metà della mia vita e ho tagliato l'eccesso. E' un metodo che può risultare in un certo spreco di tessuto; nel mio caso, il tessuto era largo solo 110cm e quindi ho rimosso meno di 5cm da ogni fianco.
A questo punto ho cucito i fianchi, aggiunto una zip, cucito un cinturino dritto e un bottone... e voilà, finito! Senza nemmeno dover fare l'orlo!

Adoro il rosso intenso di questo tessuto, e la fantasia lussureggiante. Si capisce che sono molto soddisfatta del risultato?
A volte tendo ad essere attratta da design complicati con molti dettagli, ma sto imparando che invece, spesso, mantenere le cose semplici può essere la cosa migliore :)

E infine, per concludere questo lungo post... Vi piace il mio orologio? Io lo adoro.
E' del marchio Jord e sì, è di legno (acero, in effetti)! Non credo di aver mai ricevuto così tanti complimenti per un accessorio. Mia madre me l'ha addirittura chiesto come regalo per il suo prossimo compleanno.
Mi è stato mandato dall'azienda, e io di solito rifiuto a priori l'invio di merce in cambio di un post "pubblicitario", il che sta a riprova di quanto mi piacesse questo orologio. Devo dire che sono assolutamente contenta di non aver rifiutato!
Inoltre, Jord ha gentilmente concesso un orologio in regalo ai lettori del mio blog, perciò se vi piacciono questi gioiellini in legno restate sintonizzati, perchè ci sarà presto un giveaway :D

Thursday, March 6, 2014

Pattern testing : Deer and Doe Anémone skirt

Size: 40 at the waist, 42 at the hips
Alterations: lengthened short version by about 2,5cm
Fabric: wool from my stash

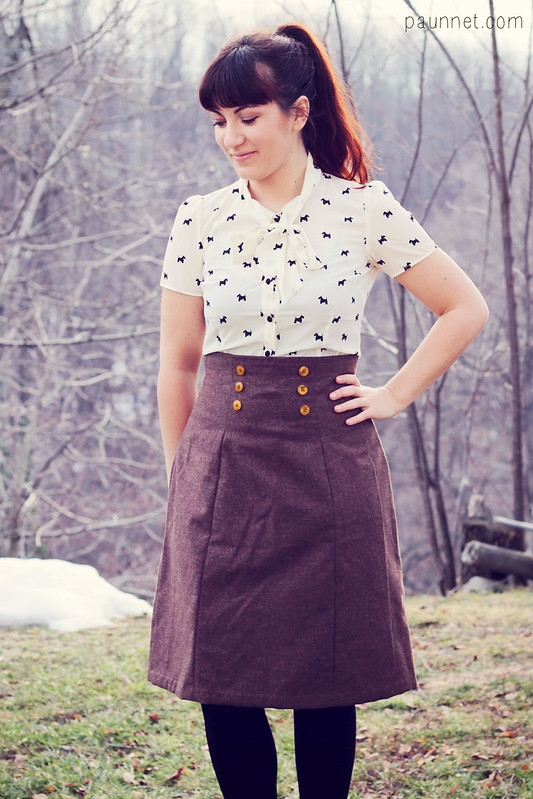
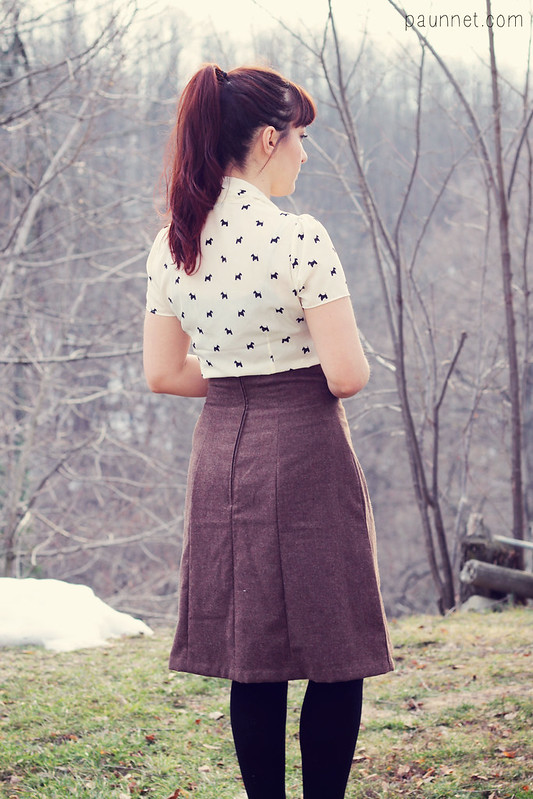
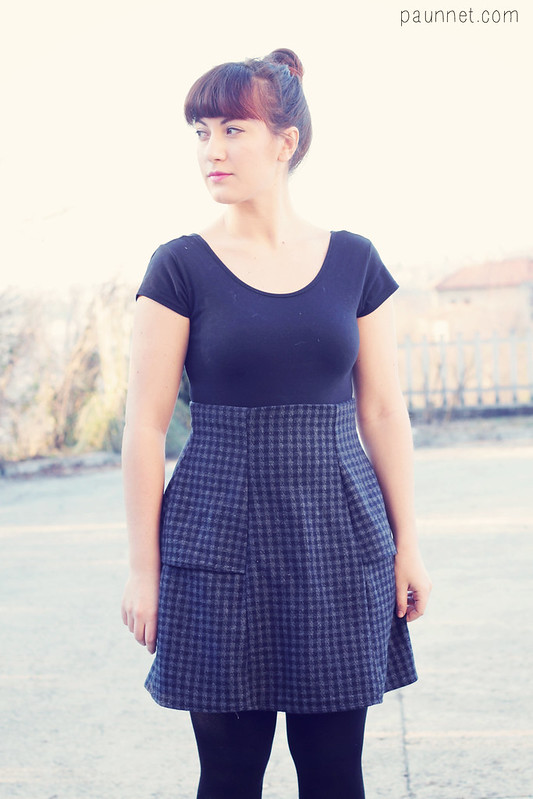
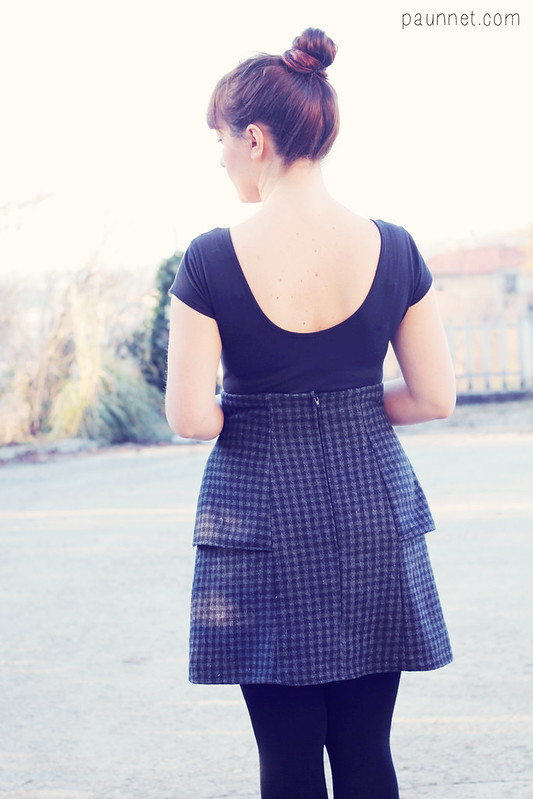
Did you see the new pattern from Deer and Doe, released yesterday? After a couple of more casual designs, Chataigne and Plantain, Eléonore took the dressy route and gave us Anémone, an extremely cute skirt in two versions: short, with peplums, and longer, with decorative buttons.

Blouse: OVS
And really, what's not to like in this pattern?
The fitted high waist is incredibly flattering, and so is the gently flared shape; the peplums are incredibly stylish and, to my dismay, they not only help to minimize large hips, they also elongate the legs.
The longer version has a 40's vibe which, hello!, I adore and the buttons are the perfect little touch to complete the picture.

The construction is also a lovely process (an it's fast) and the instructions are detailed as ever.
The skirt is fully lined, so it's marked as intermediate, but a confident beginner might manage just fine (just know there's some hand sewing involved).

Leotard: OVS

I made these two versions as a tester for the pattern and I was, as always, very impressed by the fit. With Deer and Doe, I know I just have to pick my usual size (38 for the shoulders, 40 for the waist and 42 for the hips) and I know I won't need any alterations... Mind blowing!
I know that fit is extremely personal, and not everyone will be as lucky, but, hey, I can only vouch for myself, and I couldn't be more satisfied.

There are only two things I will change for my future versions:

✄ Length: the short version of the pattern is a little too short for my comfort and the long version is a little too long (with my height, it only looks flattering if I'm wearing heels, which I don't very often). I'll draw my hemline between these two, so that the skirt hits me at my perfect spot, just above the knee.

✄ Fabric: I used wool from my stash because I'm too cheap to I don't really like to go fabric shopping for test versions, because sometimes they're not wearable, but it's not in the recommended fabrics, and rightly so. Both fabrics I used were a little too bulky for this pattern (especially the check one), and just didn't have the correct drape. Just look how much better this skirt hangs when made in a beautiful printed cotton (by Sandra) or in a heavier, solid cotton (by Clotilde)!

What fabric would (or will) you use?

Taglia: 40 in vita, 42 per i fianchi
Modifiche: allungato la versione corta di circa 2,5cm
Tessuto: lana dalla mia collezione

Avete visto il nuovo modello di Deer and Doe, uscito ieri? Dopo un paio di design più casual, Chataigne e Plantain, Eléonore ha imboccato una strada più elegante e ci ha regalato Anémone, una gonna carinissima in due versioni: corta con pepli, e lunga con bottoni decorativi.

Camicetta: OVS
E cosa manca a questo modello? La vita molto alta ed aderente sta benissimo a praticamente tutte, così come la forma leggermente scampanata. I pepli sono estremamente stilosi, e contrariamente a quanto pensassi, non solo non allargano i fianchi, ma aiutano anche ad allungare le gambe. La versione più lunga ricorda un po' gli anni '40, che ovviamente adoro e ha dei bottoni decorativi, la perfetta ciliegina sulla torta.

Non solo portarla, ma anche cucirla è un piacere (e si fa in poche ore), grazie alle istruzioni dettagliate come sempre. La gonna è completamente foderata, perciò il modello è definito come intermedio, ma anche una novellina coraggiosa ce la potrebbe fare, secondo me (basta tenere presente che le rifinizioni richiedono un po' di punti a mano).

Body: OVS
Ho fatto queste due gonne come tester per il modello e, come sempre, sono rimasta sbalordita dalla vestibilità. Con Deer and Doe, ormai, mi basta tagliare le mie solite taglie (38 per le spalle, 40 per seno e vita, 42 per i fianchi) e non devo praticamente fare modifiche... Alleluja! So che la vestibilità è una questione estremamente personale, e quindi non tutte avranno questa fortuna, ma io non potrei essere più felice di questi modelli.

Per le mie versioni future, ci sono due cose da cambiare:

✄ Lunghezza: la versione corta del modello è un po' troppo corta per come sono abituata e la versione lunga è un po' troppo lunga per la mia altezza (perchè non mi tagli, la devo portare coi tacchi, cosa che faccio estremamente di rado). Ridisegnerò la mia linea per l'orlo esattamente tra le due lunghezze, in modo che cada appena sopra al ginocchio.

✄ Tessuto: ho usato della lana che avevo in casa perchè sono troppo tirchia non mi piace comprare stoffa per le versioni test, visto che a volte risultano importabili, ma non viene elencata nei tessuti consigliati, e a ragione. Quella che ho usato io (specialmente quella a quadretti) è troppo spessa e non ha il giusto peso per questo modello. Guardate com'è subito più bello questo modello se fatto con un bellissimo cotone stampato (da Sandra) o con un cotone più pesante a tinta unita (da Clotilde)!


E voi che stoffa user(s)te?

Tuesday, November 26, 2013

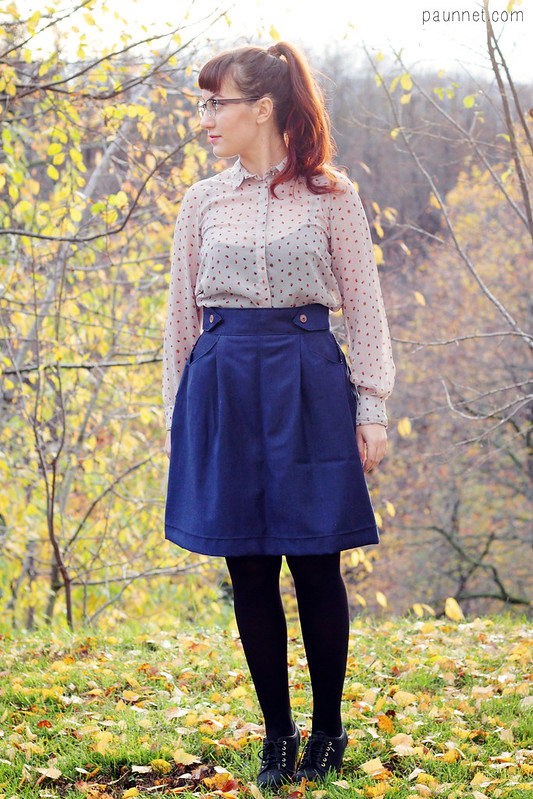
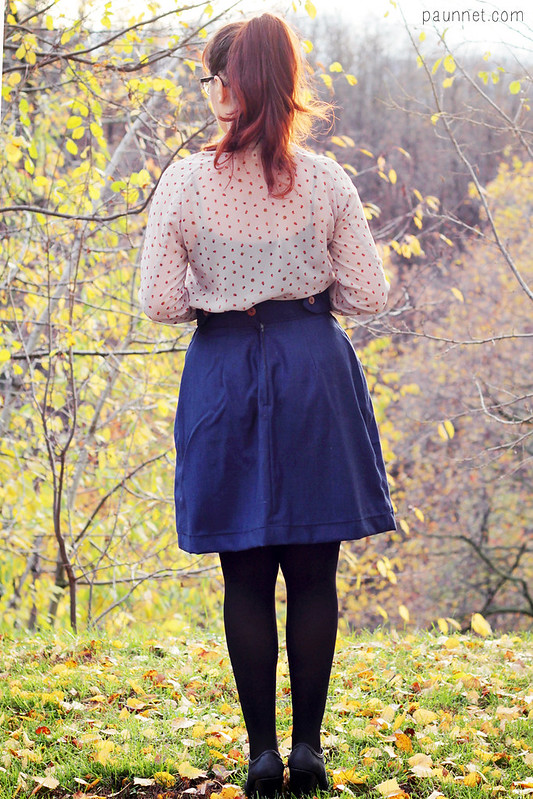
Navy Peggy skirt

Size: I cut a size 12, but then I removed some excess fabric at the waist, so the end result it's probably more similar to a size 10.
Alterations: removed almost 20cm (8") from the bottom (!)
Fabric: some navy blue wool with extremely subtle pinstripes (that you can barely see in these pictures) from my stash.


When Bluegingerdoll released the  Peggy skirt pattern, Abby (the creator) contacted me to know if I wanted to try it. It's extremely rare that I turn down free patterns (you know, being an addict and all), and this little skirt really intrigued me, so I said heck, yes. 

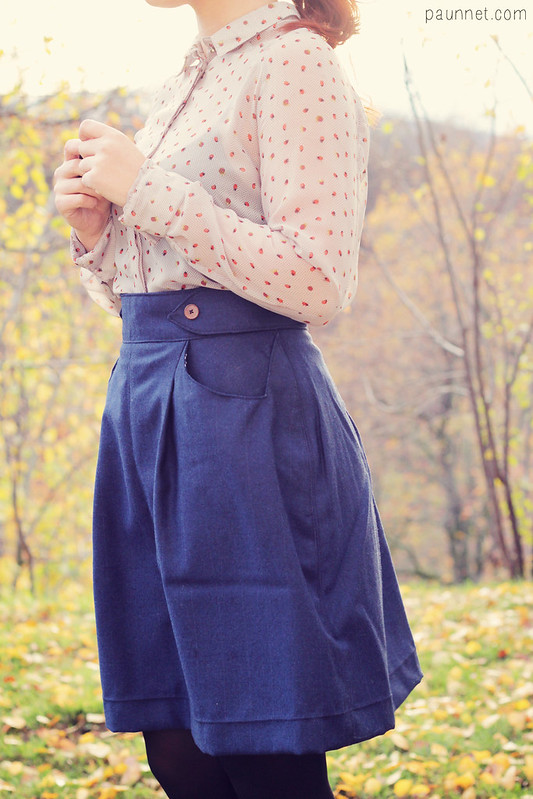
The Peggy skirt is designed for beginners and it's a flared high-waisted A-line skirt with front tucks. Three waistband options are included in the pattern; I chose view A, a straight waistband with cute buttoned tabs.

One thing I really regret about this project is not reading the instructions properly before starting to sew. The pockets are made in a slightly different way than I'm used to (there's a pocket fuse to reinforce the pocket edge and the pockets themselves hang free from the side seams of the skirt), so I ended up making a few mistakes in construction, but nothing major.

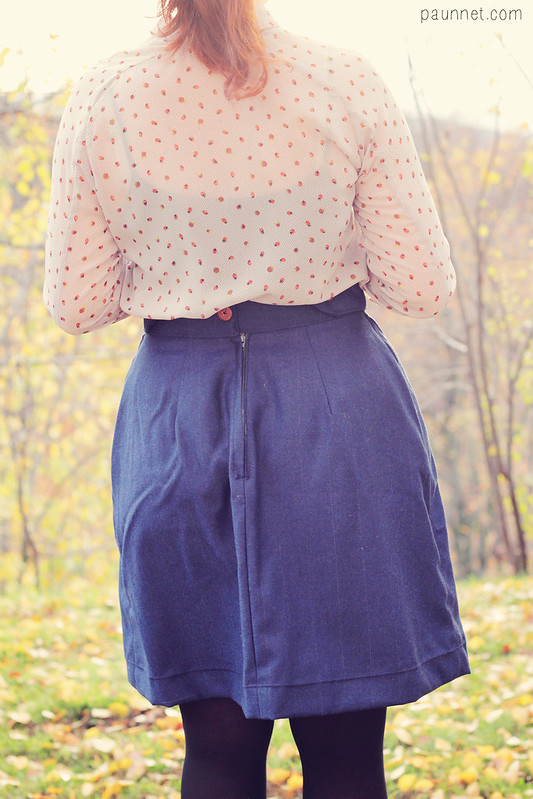
Speaking of the instructions, because this pattern is aimed at beginners, I was expecting a little more guidance from them. There are a couple generic steps, namely the lapped zipper insertion (which refers you to the Bluegingerdoll blog) and the waistband construction at the center back (it's not very clear where and how the two sides of the waistband overlap). Thankfully, Abby did a very extensive Peggy sewalong, which is a huge help to those who need more visual aid (although the waistband thing is still not explained clearly).

As I mentioned at the beginning of the post, I shortened this skirt by A LOT. Luckily, Abby included the finished skirt measurements on the pattern envelope, and the finished length is 68,5cm (27"), whereas I hem my skirts between 50 and 55cm (between 20" and 22") down my natural waist. Unless you're incredibly tall or you really want that vintage length, be aware of this!

Eek! Sorry about the wrinkled mess! Shouldn't have sat down before shooting!
I already mentioned the topic of my favorite skirt patterns for beginners here and here, and Peggy goes straight to join that list. I love that this skirt has more flare than an usual A-line, I like it much more on a pear-shape like myself. The pattern has also a very reasonable price, especially considering that it comes with three variations and free worldwide shipping!

Now, if you like this pattern, you have the chance to win one copy for yourself. Abby was kind enough to sponsor a giveaway for my readers!
The giveaway widget is below, you need to sign in with Facebook or with your name + email. You can enter four times; just follow the instructions, I promise it's very easy.
This is my first time trying out Rafflecopter, so fingers crossed everything works out!
You have one week to enter. Good luck, everyone!

a Rafflecopter giveaway

Wednesday, November 20, 2013

An old Beignet skirt and a new pair of glasses


Size: size 10.

Alterations: omitted the fabric belt.

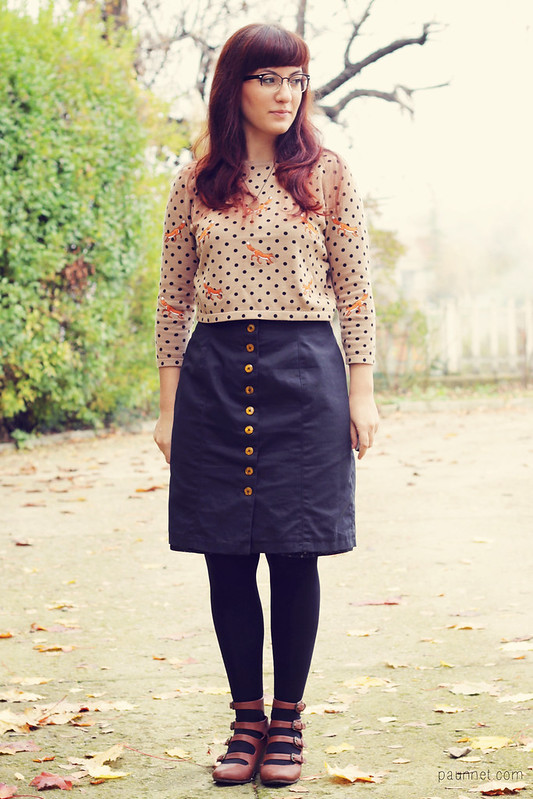
Fabric: the same black cotton canvas I used for my first Kelly skirt and some flowery lining material , both from my stash.

Last week I found this UFO skirt under a pile of muslins and stuff to throw away in a corner of my room. I'm ashamed to say I didn't even remember of its existence. I'm not usually an UFO kind of girl: when I start a project, I always try to finish it before I start another one.

But the reason why this Beignet defeated me is because it features one of my greatest sewing enemies: buttonholes, and 12 of them nonetheless. Just the word "buttonholes" makes me instantly lazy. It's completely irrational, since I include them in my favorite projects (like my Bleuet dresses) and my machine even has a "memory" function for buttonholes that makes sewing multiple one much easier.

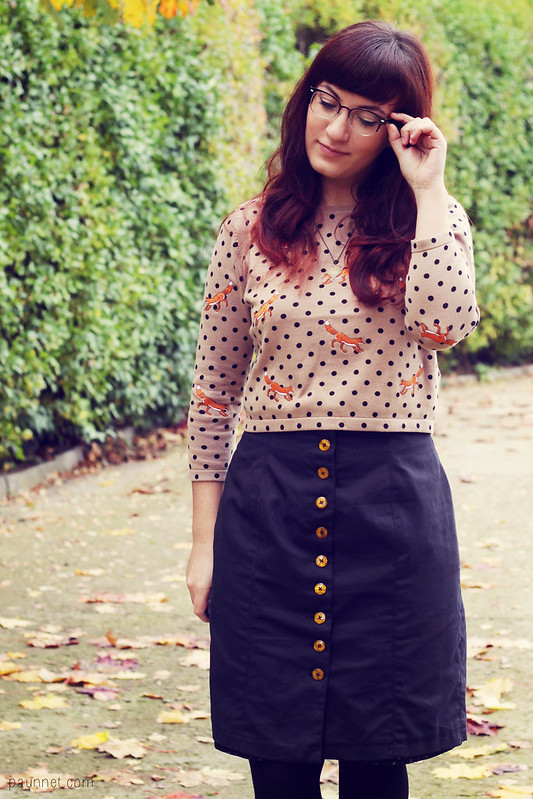
Sweater: ASOS - Shoes: Pimkie (old) - Glasses: c/o Bonlook
Anyway, when I found this skirt everything else was finished except for buttons and buttonholes, so I just sat down, grinned my teeth and half an hour later I had a perfectly wearable skirt.

The combination of black and Beignet means lots of wearability for me. I made this skirt two more times (appearances here and here) and they're still the most worn separates in my wardrobe. This skirt will join them soon.

I'm wearing the Peacock frame in Dark Chocolate.
And because I didn't have a lot to say about this skirt, I decided to kill two birds with one stone and show off my new glasses.
I was contacted by Bonlook a while ago to try one of their frames and to offer a pair to my readers, and as much as I try to keep this blog strictly sewing-related, I couldn't pass up the opportunity.
I mean, if I could afford it, I would probably own at least a dozen pairs of frames; I've been wearing glasses since I was 8 and have learnt to appreciate them as style accessories, so why deprive myself and one of you guys of this chance?
Moreover, Bonlook offers some awesome looking frames, and I had the pleasure to experience they are great quality and come with excellent customer service.

I hope you'll appreciate this giveaway even though it's not sewing related.

To win one pair of BonLook glasses of your choosing (prescription, non-prescription, sunglasses... anything!) valued at $99 (shipping is not included) just click here.
The giveaway is open to everyone for a week.

Good luck!

Friday, September 27, 2013

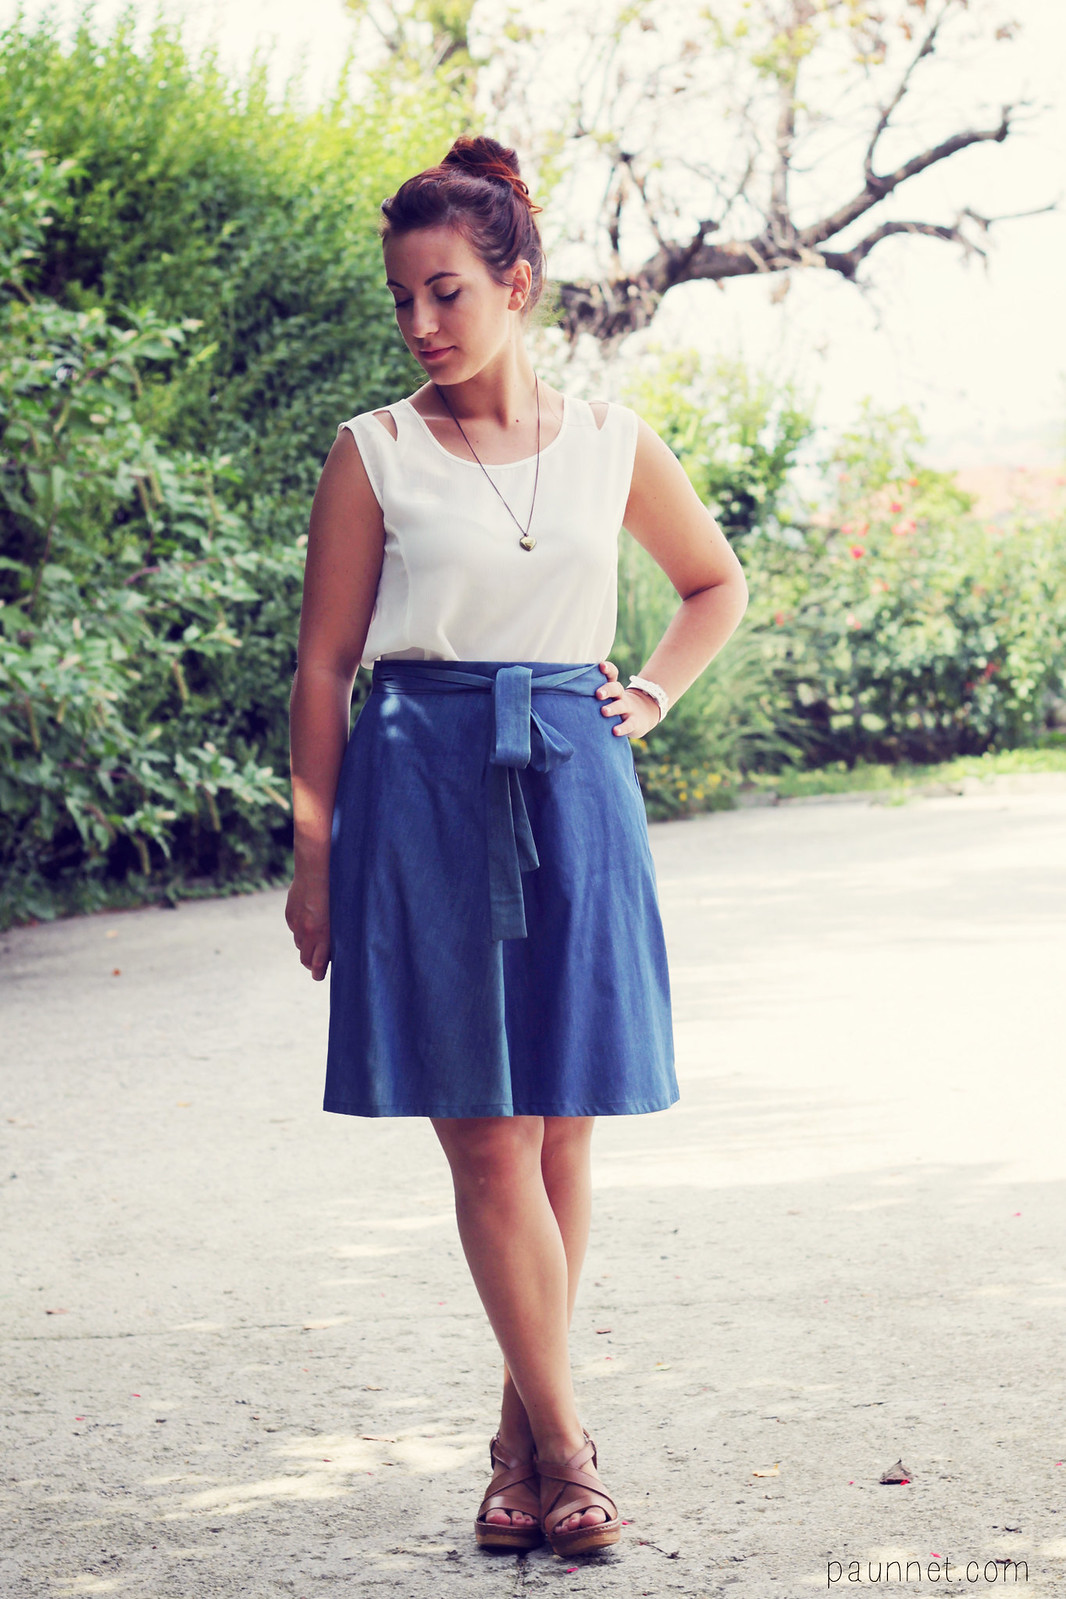
Last of my summer sewing : Denim Miette skirt


Pattern: Miette skirt by Tilly and the Buttons

Size: size 4

Alterations: shortened by about 5 cm

Fabric: a cheap lightweight denim I purchased locally. And when I say "cheap", I mean "cheap", not just inexpensive. Not my best fabric buy.


I touched the topic of the perfect pattern for beginners in my last post, and this one is another great contender!
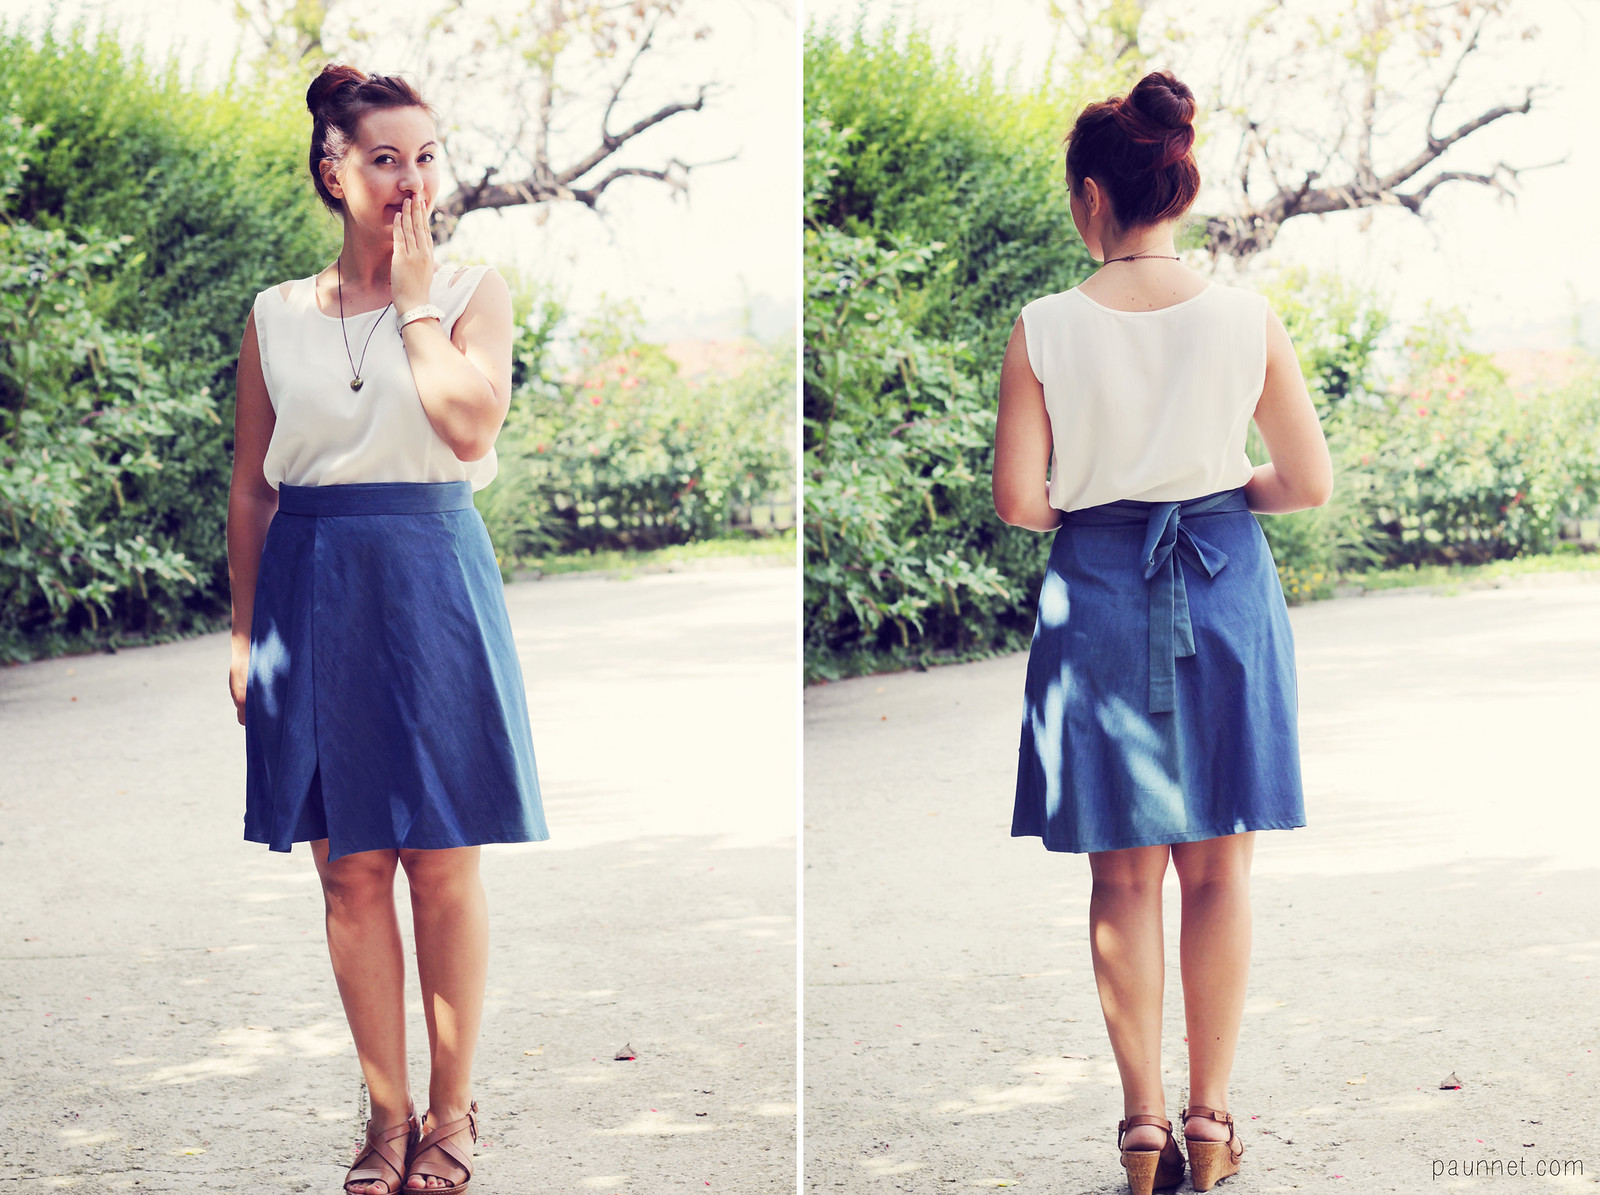
The only long part in constructing this skirt are the waistband ties: sewing, trimming the seam allowances and handstitch or stitch in the ditch is the longest part, but other than that, it's another instant gratification project. And it doesn't require fitting! Also, the instructions are very well written, Tilly did a superb job.

This is an extremely "easy" skirt, because the style and the color allow me to pair it with basically everything in my wardrobe. And this skirt is not retiring anytime soon, I'll just add tights and a half slip and I can wear this all Autumn.
And there's also another Miette coming soonish to the blog...

I must admit I wore my Miette backwards most of the times, with the bow on the back and the panels overlapping in the front. This way, it's easier to avoid wrinkling the fabric when you sit down and you can wear tops with interest in the front (collars, bow ties, etc.) without redundancy.

Before I leave, can I ask you a favor? My Mae blouse (which I have yet to blog about) is competing on the Bluegingerdoll blog and if you could cast a vote for me, that would make me very happy.

See you soon with my last summer project!

Wednesday, September 25, 2013

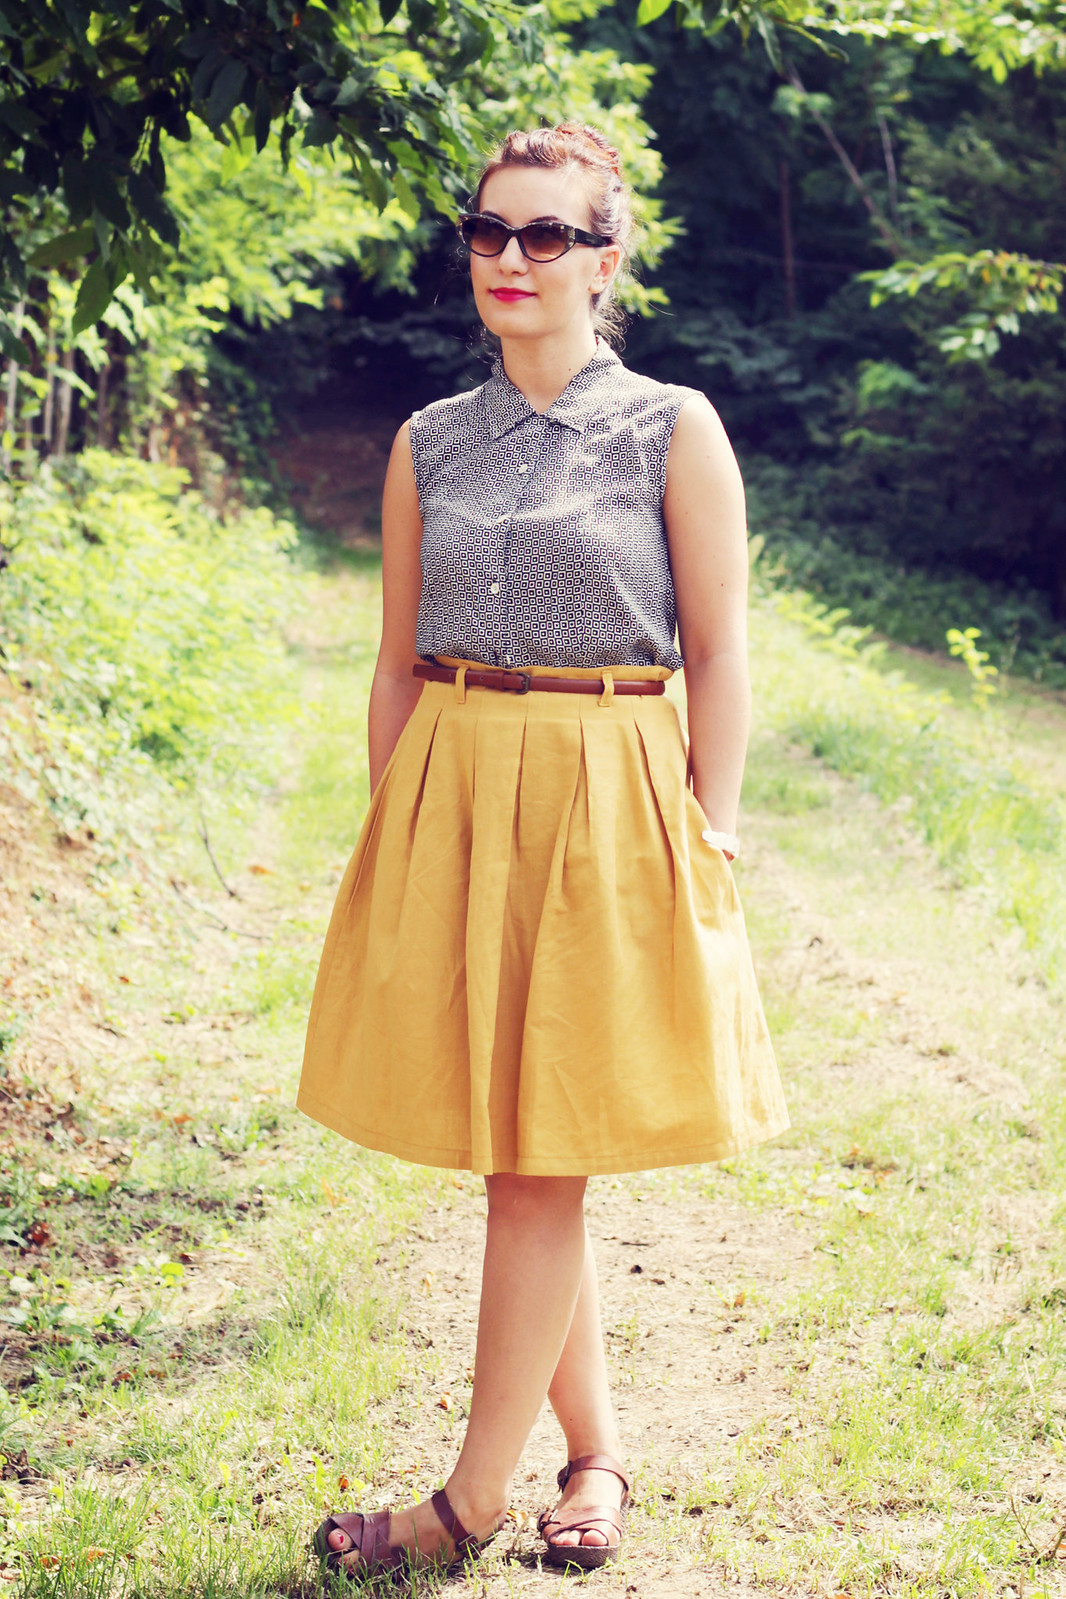
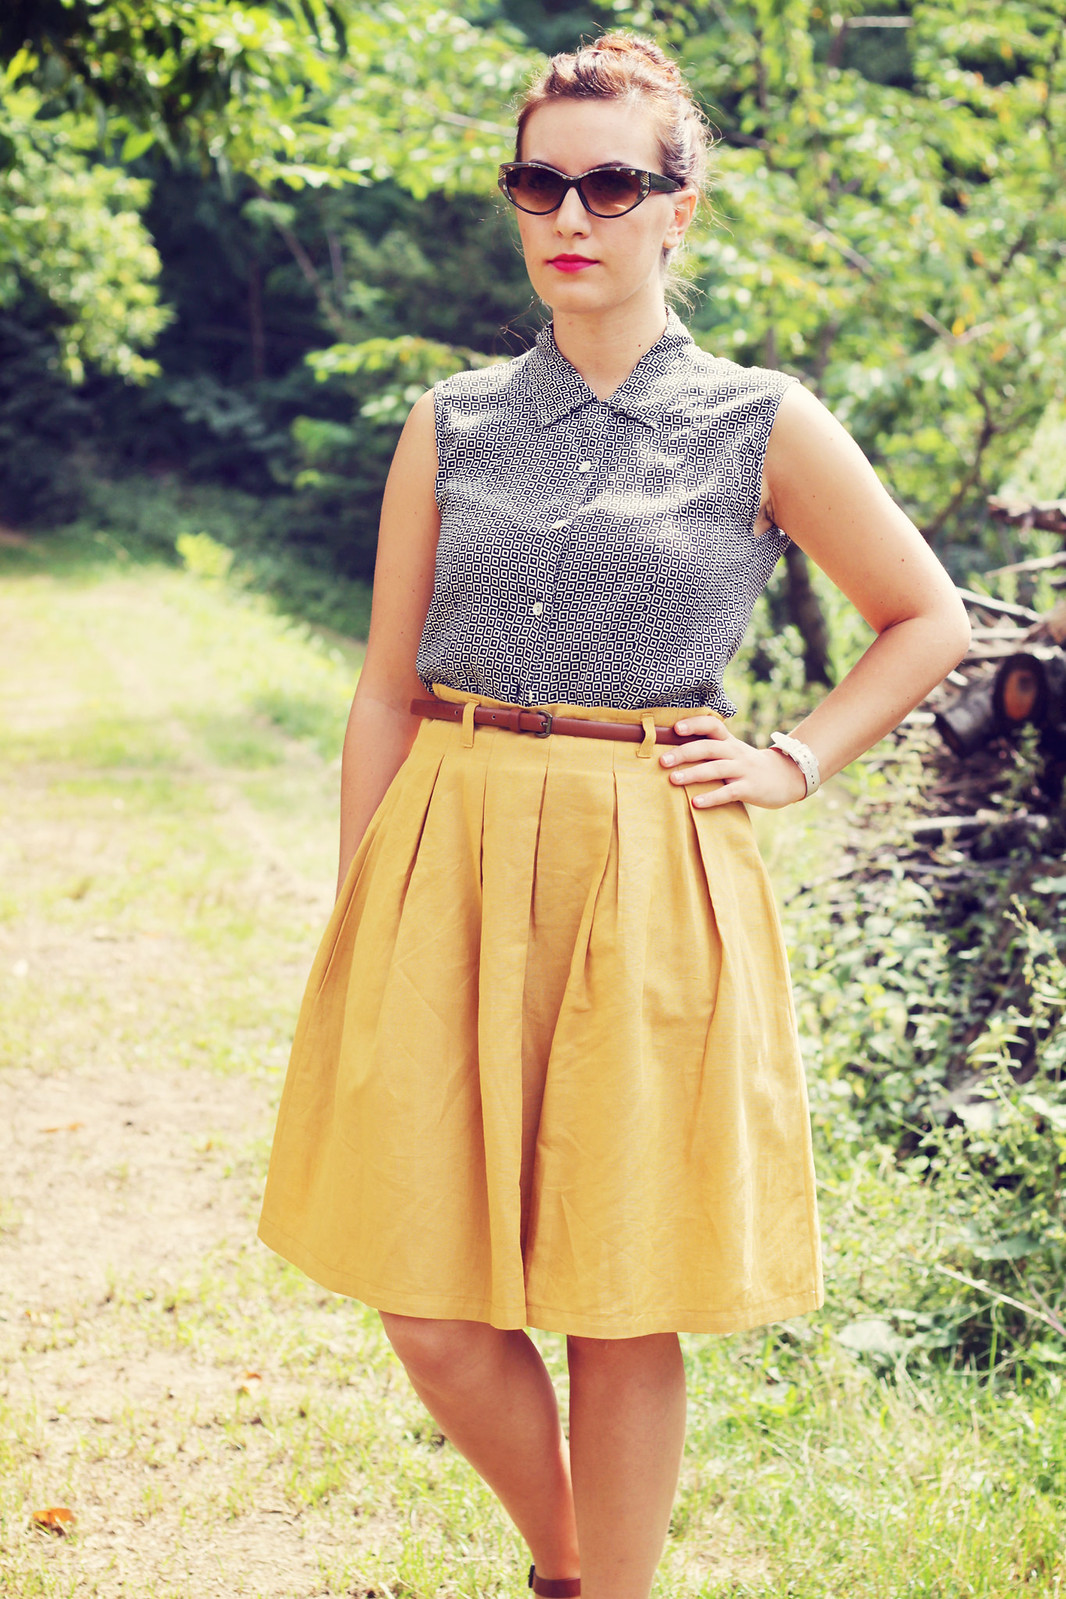
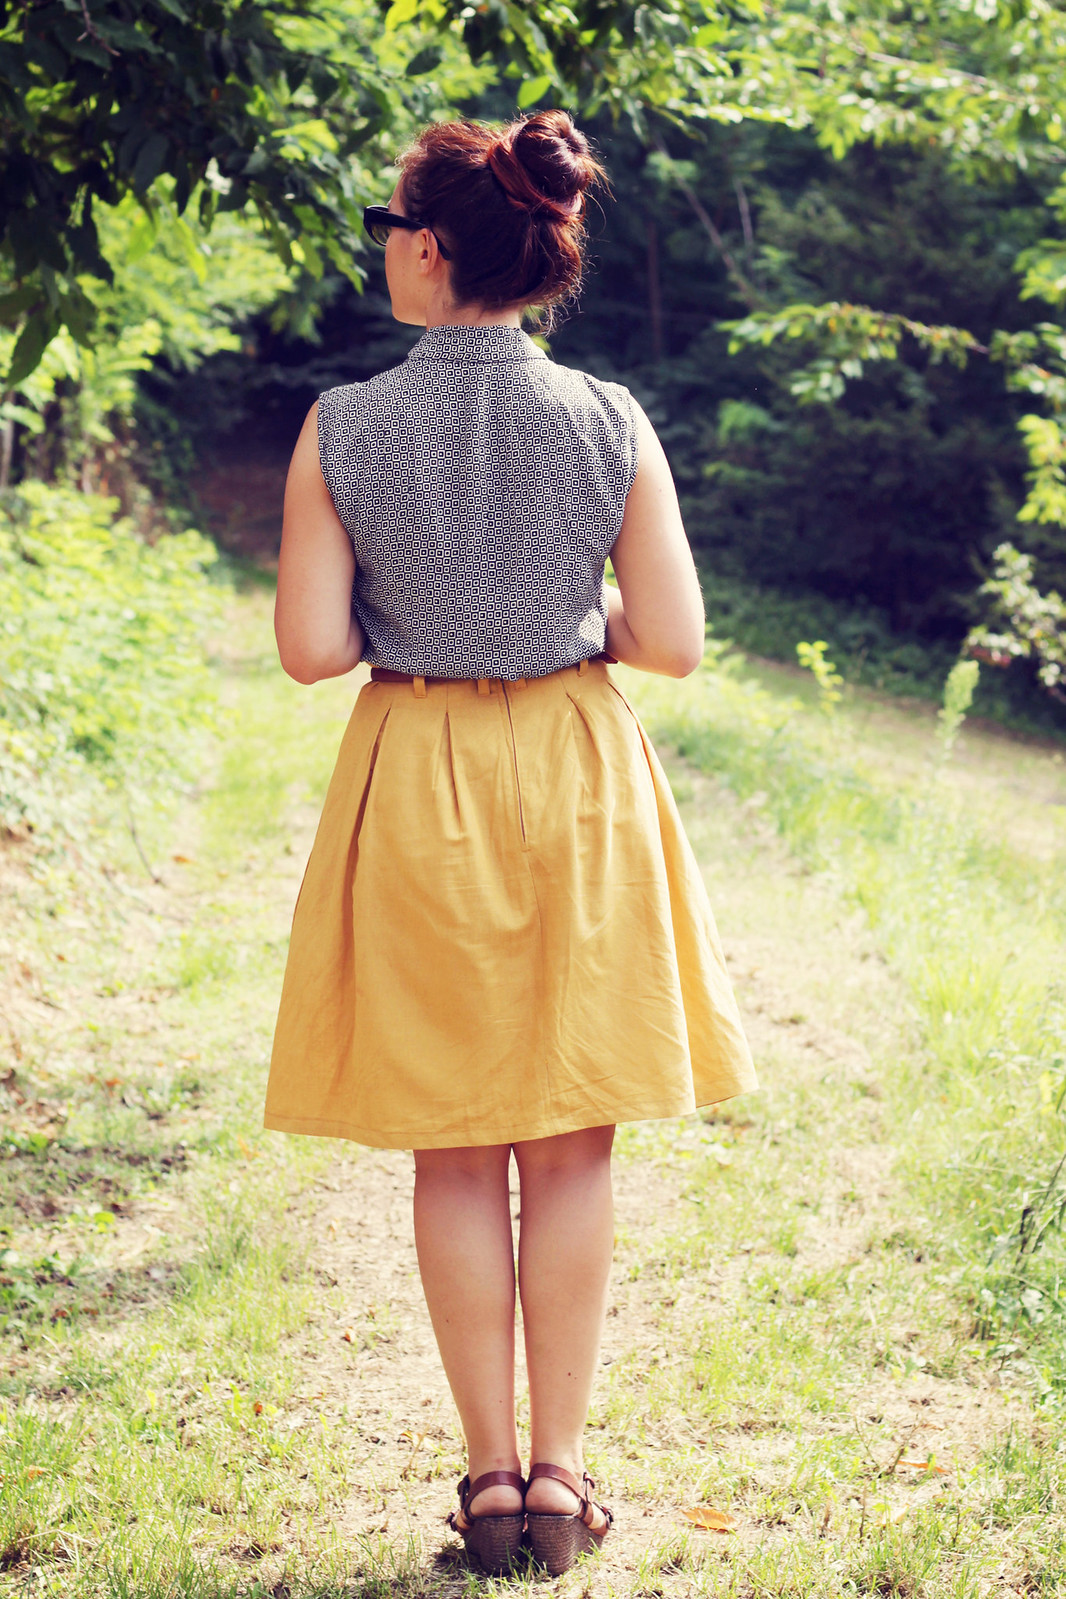
Last of my summer sewing : Yellow Chardon skirt


Size: size 40 at the waist, graded up to a 44 at the hips to have the most flare possible.

Alterations: hemmed to my preferred length.

Fabric: a mustard linen-look cotton, purchased locally


There are a few projects I made and wore extensively this summer that somehow didn't make it to the blog. I've been lazy and I've been on holiday, so even though I took photos, I didn't blog them.
I usually prefer to leave some time between posts of completed projects, but because it's almost October and I still want to show them off, I decided to cram them all up in a week. I hope you won't mind and that you'll still appreciate them even if Autumn has arrived where you live. We're actually having an Indian summer here, so I could still wear these for a few days.

This is the first of the aforementioned garments: the Chardon skirt by Deer and Doe. Rachel started a conversation on Instagram a few days ago on the perfect skirt for beginners, and this is it for me. It's universally flattering, very easy and fast to sew, and it's very easy to fit (thanks to the ribbon or belt loops options). For someone a little more experienced, it's instant gratification.
What is the perfect beginner skirt pattern, in your opinion?

I've worn it a lot this summer, especially with sleeveless button-ups, another obsession of mine, and I find the effect very effortless chic.
What else can I say? This skirt is going to be retired soon until next spring, but the more I look at these photos, the more I want to make a version in wool for winter... We'll see.

See you in a couple of days with another skirt!

Saturday, August 18, 2012

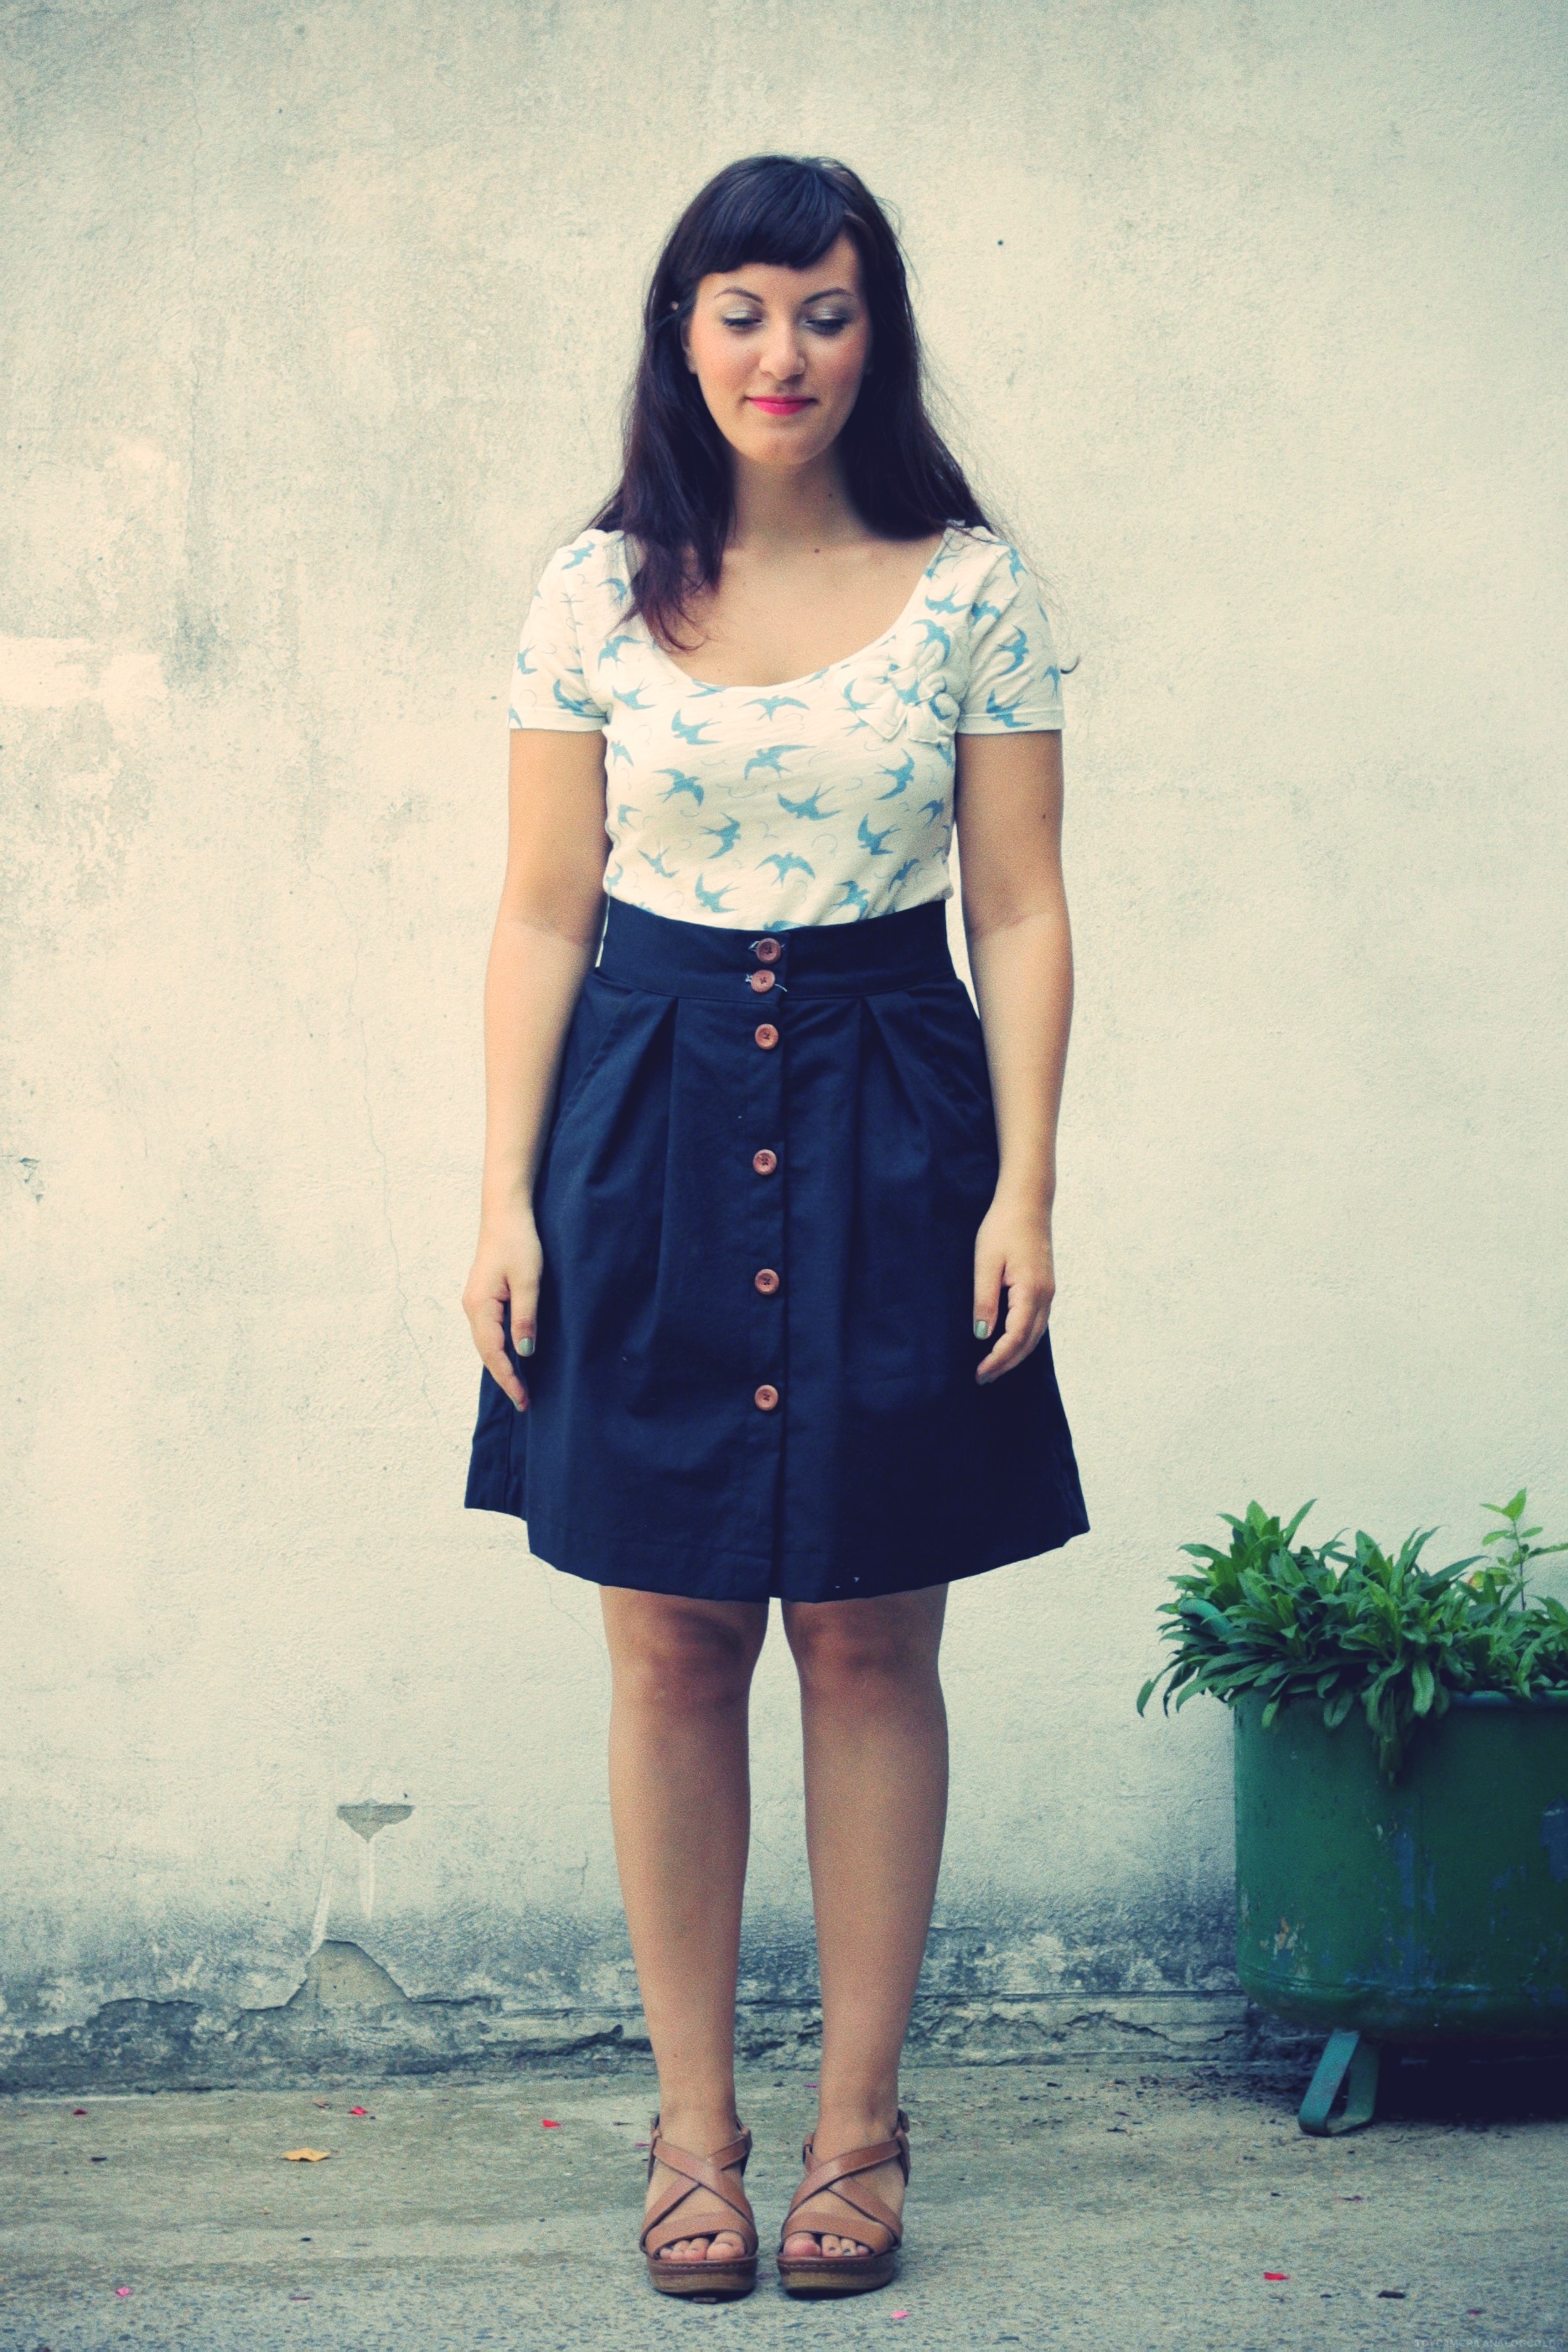
Kelly Skirt


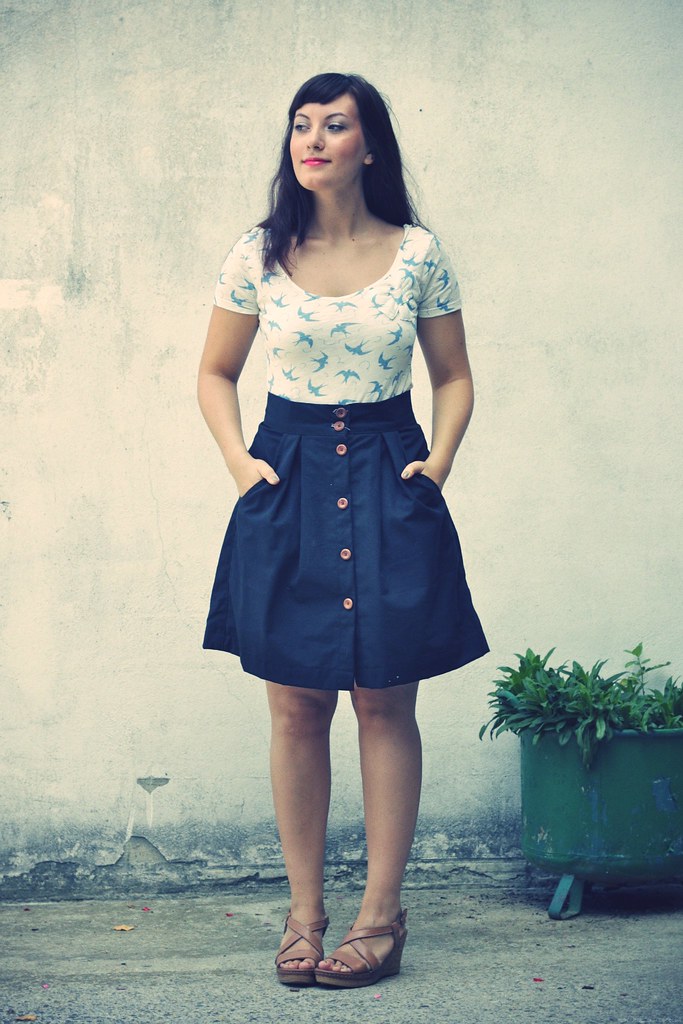
Back in May, I was lucky enough to be a tester for Megan Nielsen's new pattern, the Kelly skirt. If you've been reading my blog for a while, you know I love her and her designs, and this was no exception.
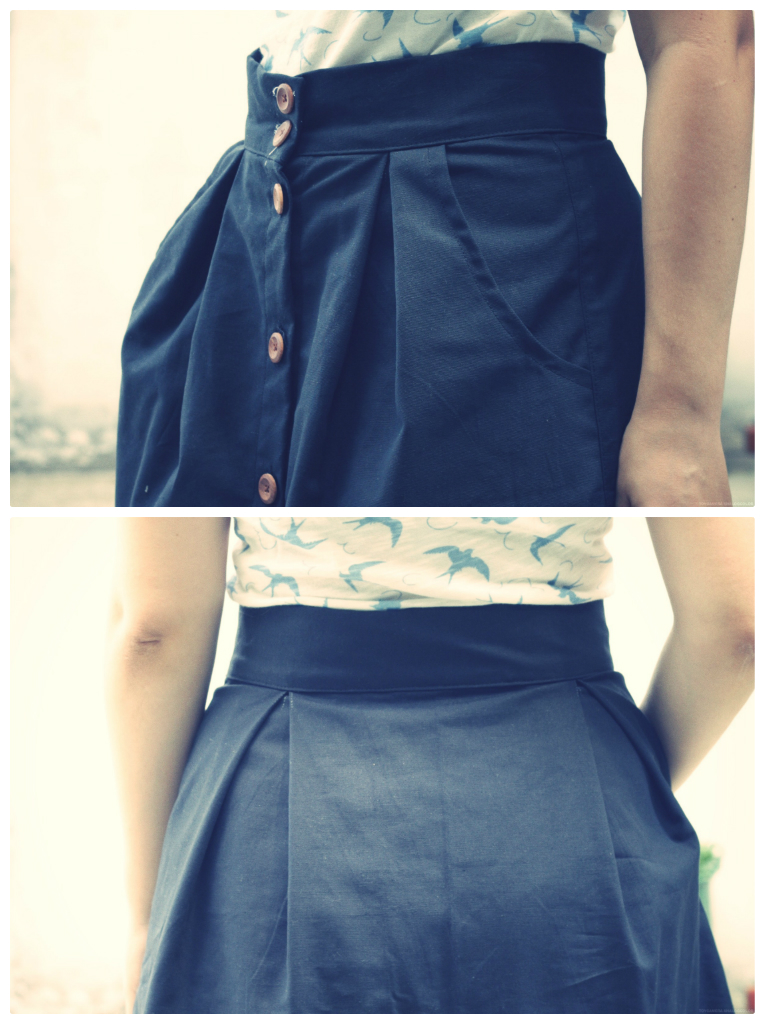
This skirt is aimed at beginners and I completely agree on the skill level. My skirt came together in about six hours from cutting to wearing, including six time consuming buttonholes, one of the things I dread the most sewing. I can't decide if I should add a seventh button, I don't need it for practical reasons, but I feel the skirt might look better with it. What do you think?
If you're a beginner and you're scared of buttonholes, you can just sew the ones you need to pull the skirt up and down (for me it's 4) and sew the remaining buttons through all the layers of fabric.

Fabric wise, I took the boring route and chose a black cotton canvas (although it looks blue in the photos) I had in my stash. I wanted something I could wear with basically every top I have in my wardrobe and I couldn't be more satisfied.
This skirt looks great with anything! Blouses and t-shirts, casual and dressy. And it's so flattering! I was a bit worried when I first got the pattern because A-line skirts don't always look good on me, but I was amazed when I put it on. It's one of those garments that make me feel confident when I wear them.
And did I mention it has lovely pockets?

On a side note, I know in my photos I usually look quite serious, almost stuck-up. It's the general first impression most people get of me (I even had a teacher in elementary school telling me that, so...), to the point that I appear pissed off or bitchy. What can I do, it's my natural expression and I can't really help it. Truth to be told, I am a serious person, but I have other sides to my personality, of course.
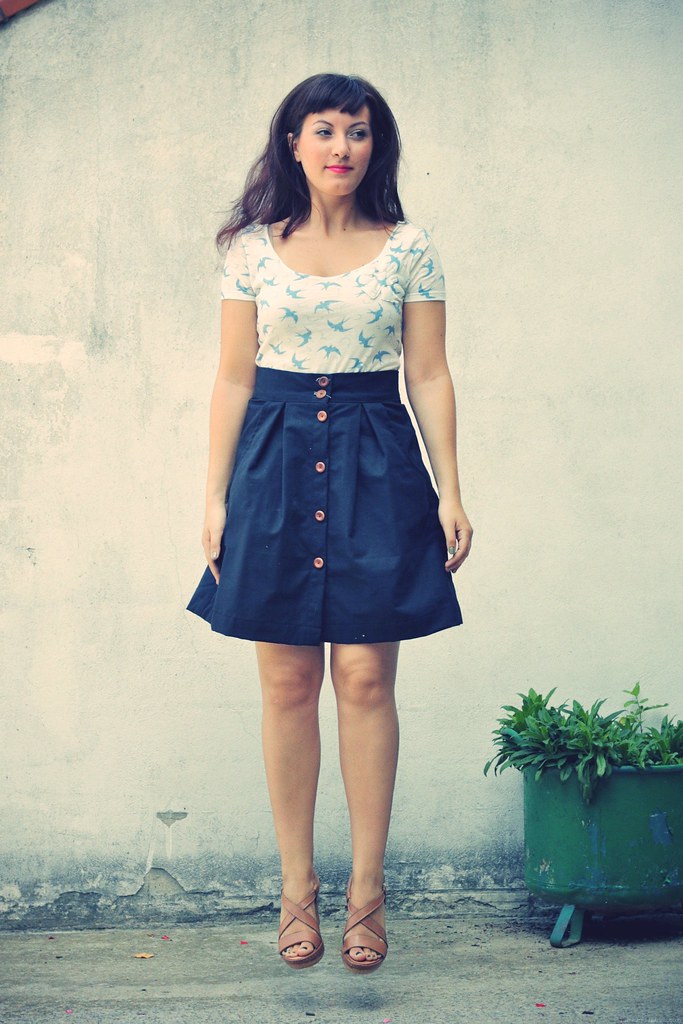
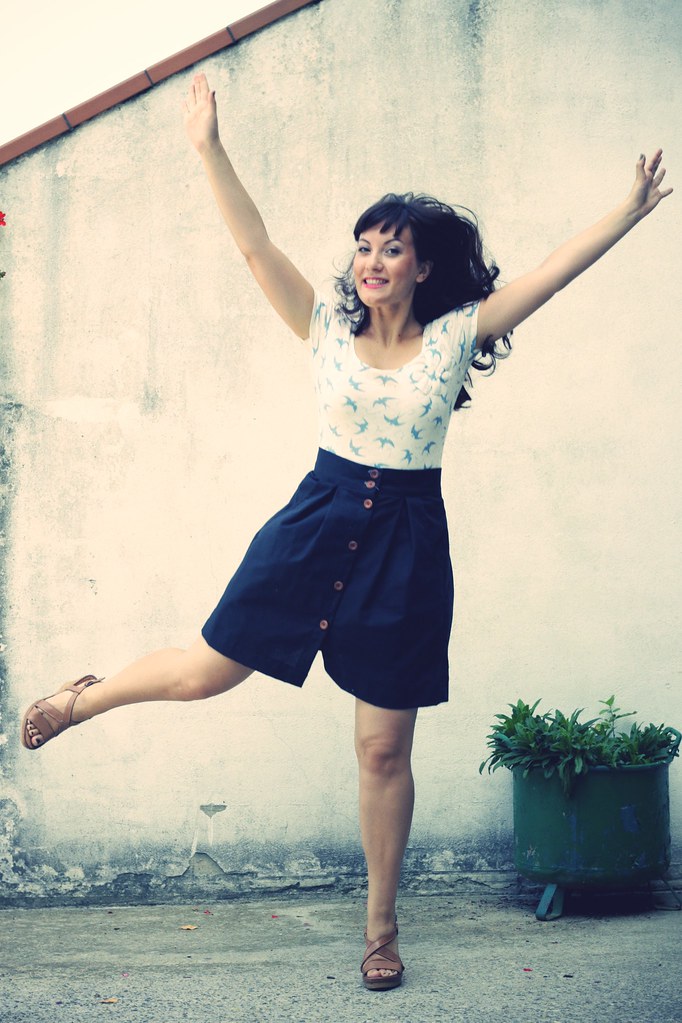
Like this afternoon. I needed to blow off some steam and decided to have some fun with these photos. So I started jumping...

And then this happened...

I'm sharing this shot in the hope of making someone laugh, I know I need it at the moment :)

To end this post on a semi-serious note, some conclusive thoughts: I can't recommend this pattern enough. Even though it's very simple, I absolutely think it's worth the money. By changing fabric types and lenght, you can have a very versatile pattern too.
I hope there will be more Kelly skirts in my future, I definitely want to try and make one in a softer, drapier fabric.

If you want to see more lovely Kelly skirts, go check out Andrea and Kelli!